Today I would like to show you how we can use Github Actions alongside GCP, Packer, and Ansible, in order to build and track machine images.
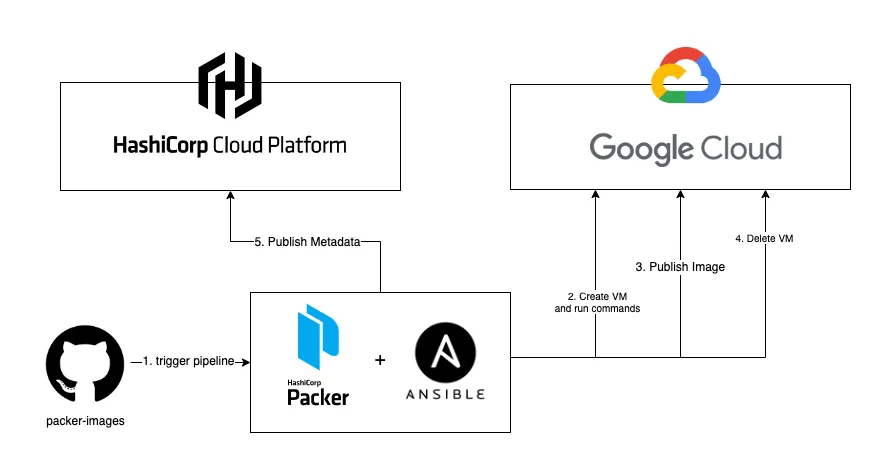
Hashicorp Cloud Configuration
Before we proceed to the pipeline explanation, we need to configure some credentials. Beginning with Hashicorp Cloud.
- Login into Hashicorp Cloud
- Go to the IAM Section
- Create a Service Principal, and save the ID and SECRET given.
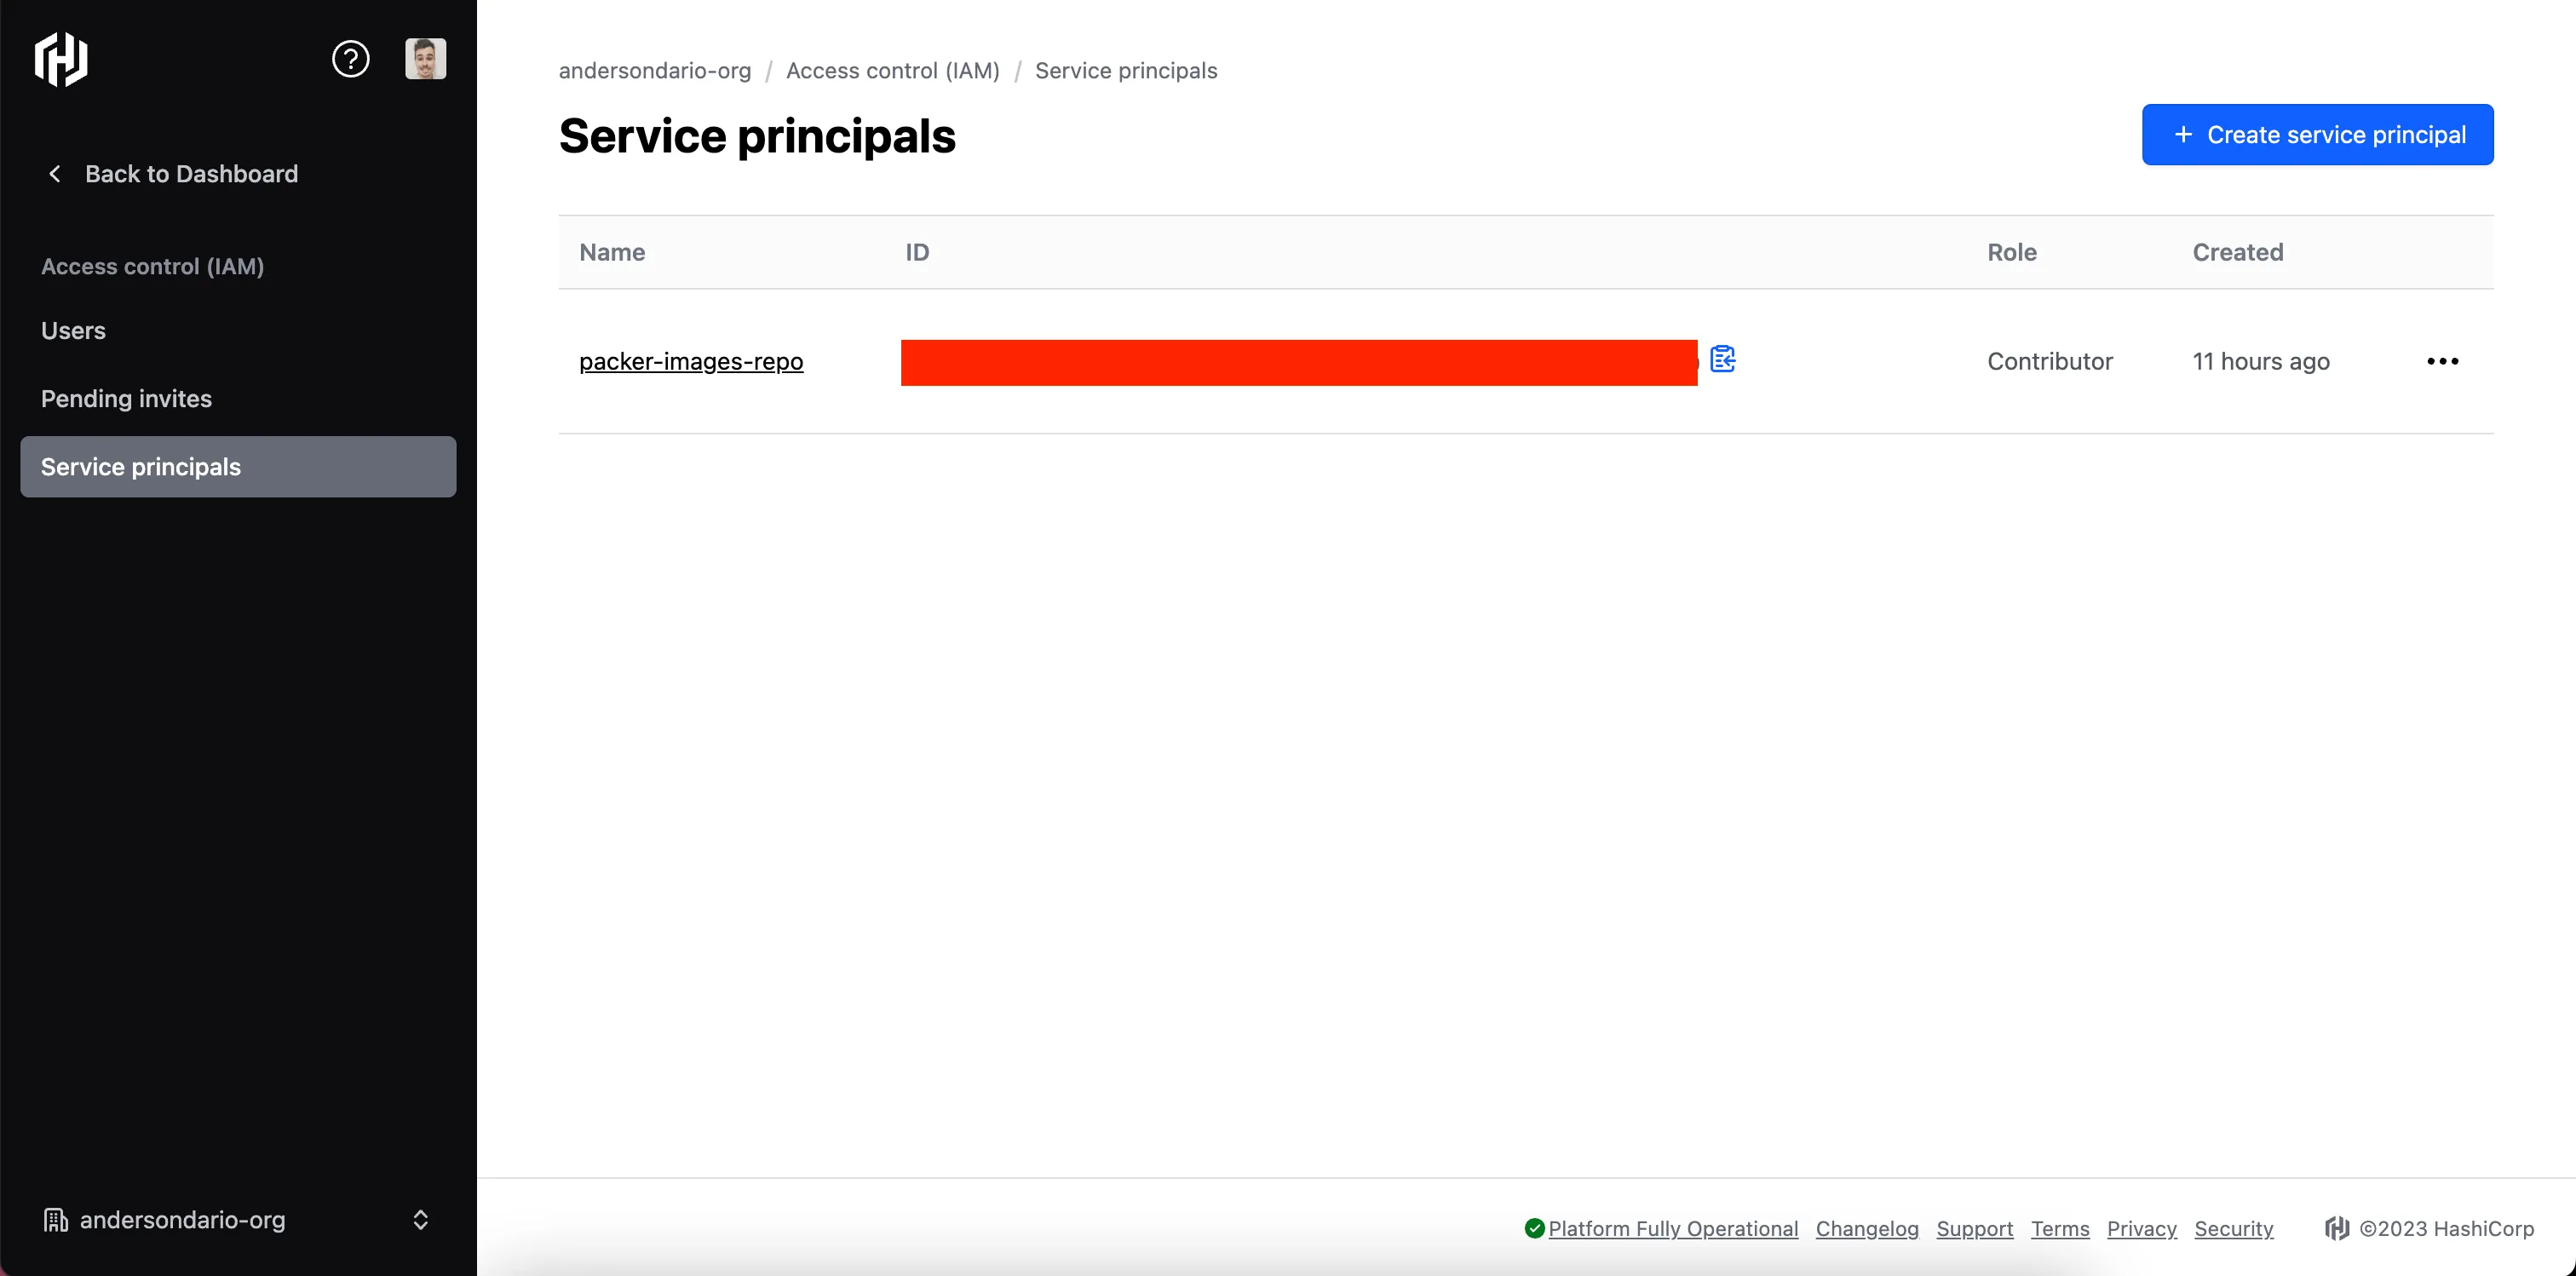
Service Principal Example
- Then, go to the Packer section and create the repository.
Google Cloud Configuration
In the Google Cloud, we need just need to create a Service Account with three roles: Compute Instance Admin v1, Service Account User, and IAP-secure Tunnel User.
- Login into Google Cloud.
- Go to the IAM Page -> Service Account
- Create a Service Account
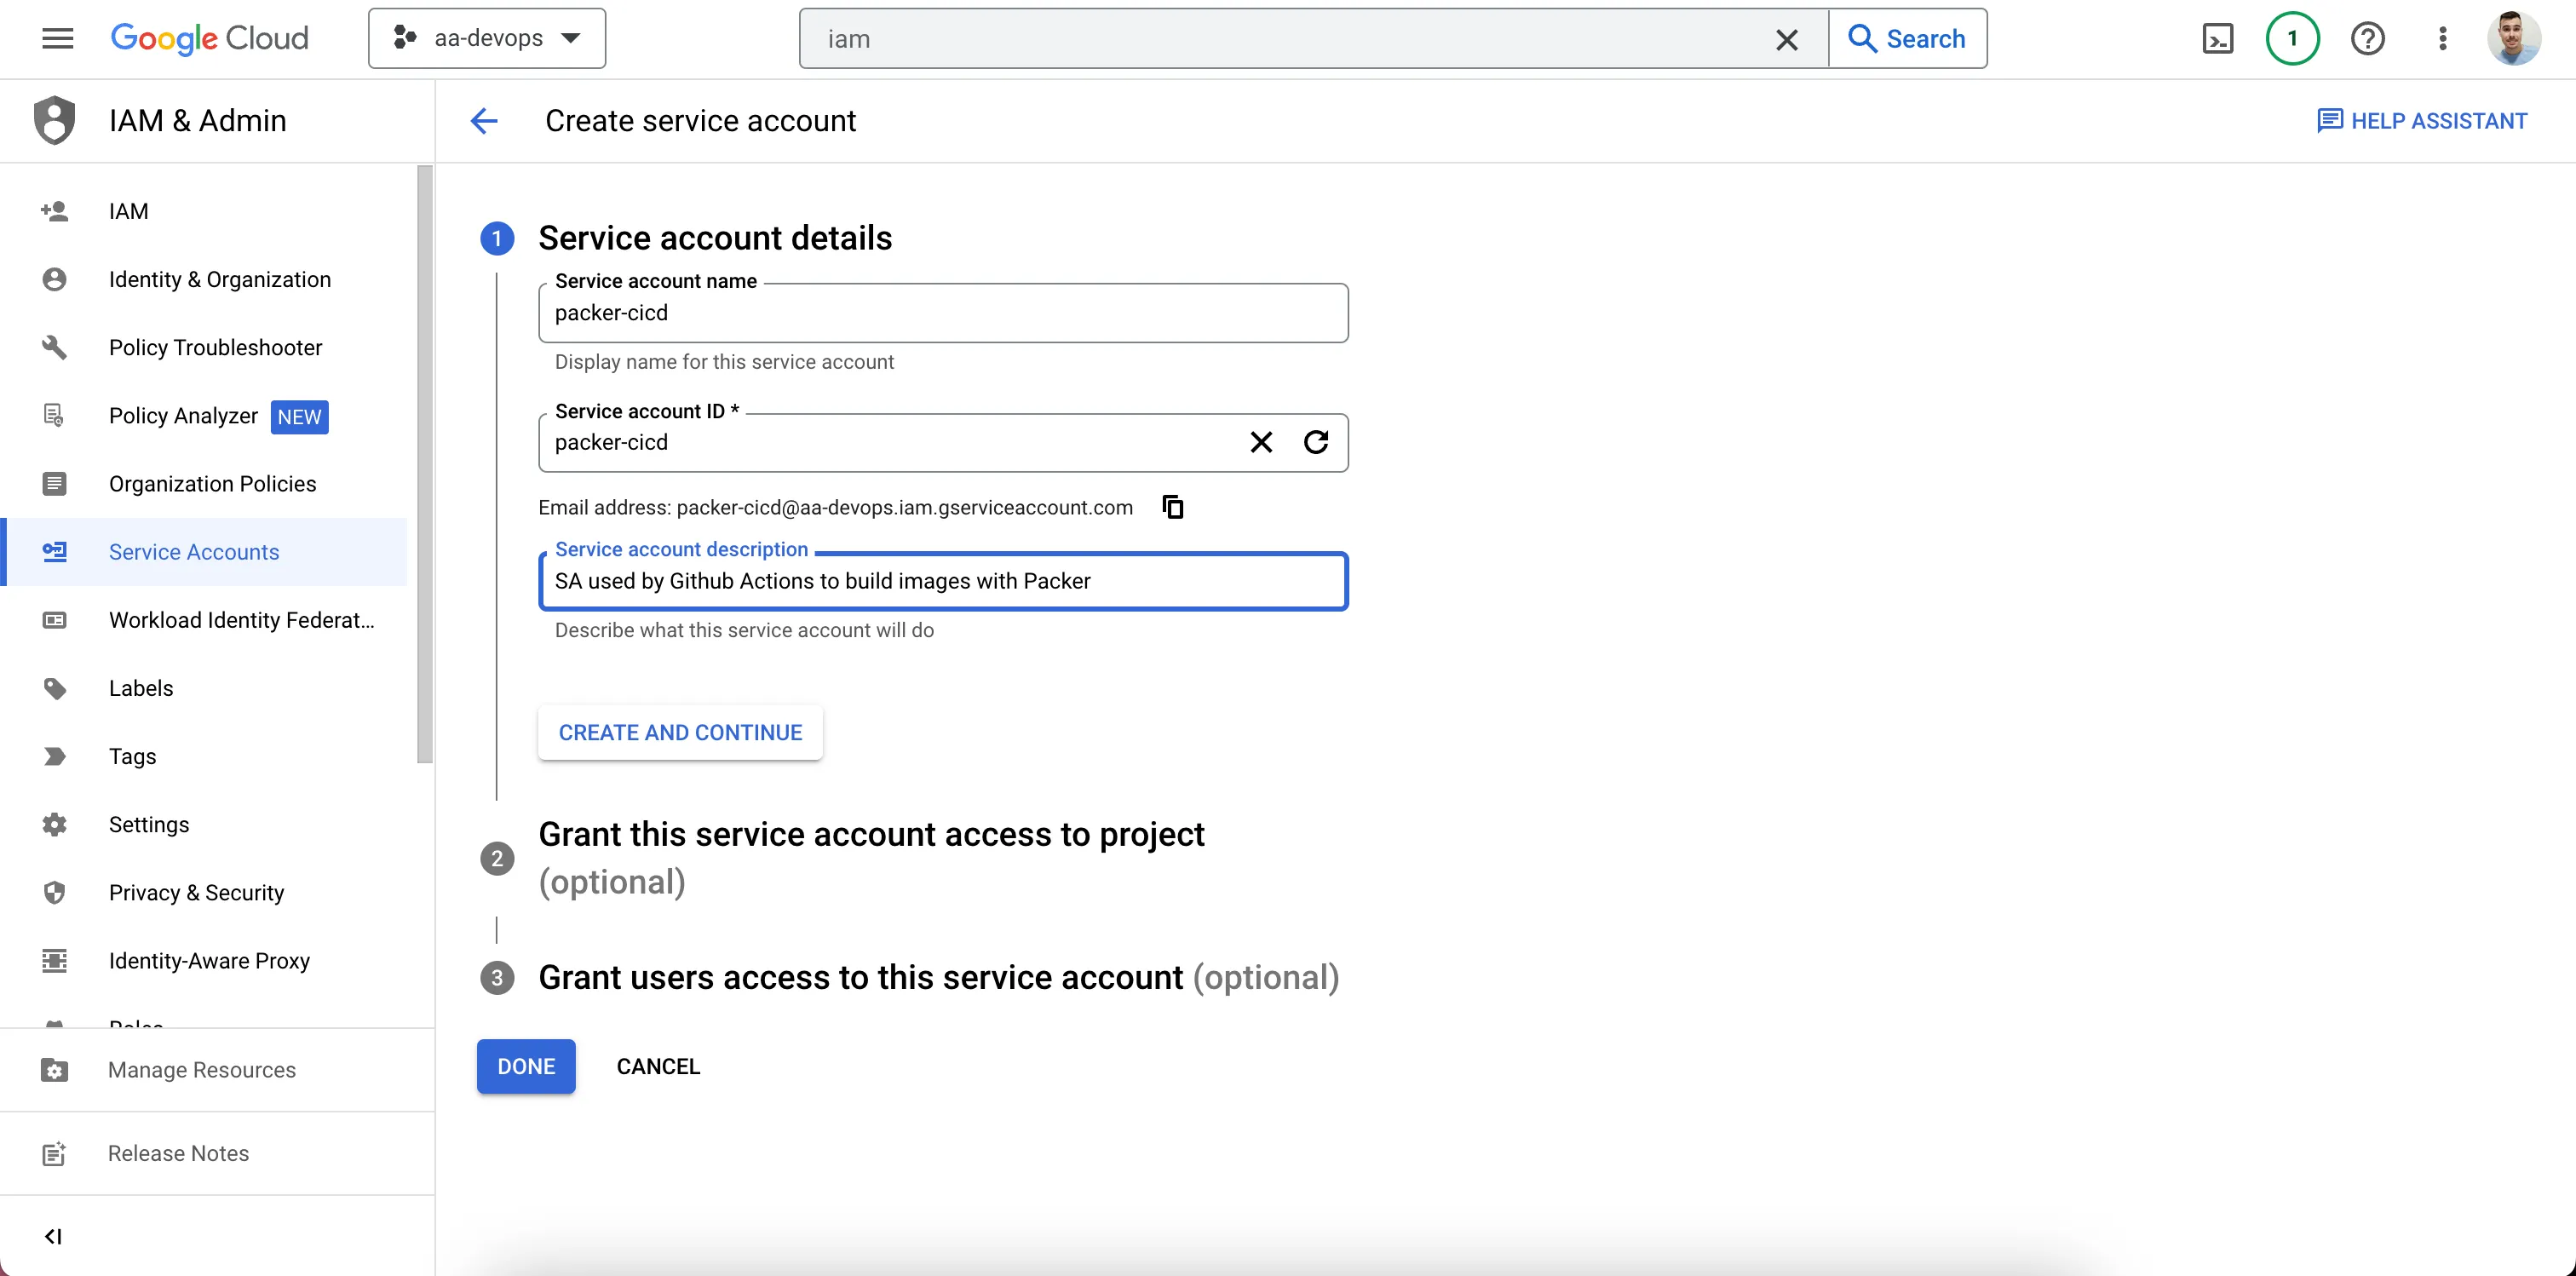
SA Example
- Add the permissions:
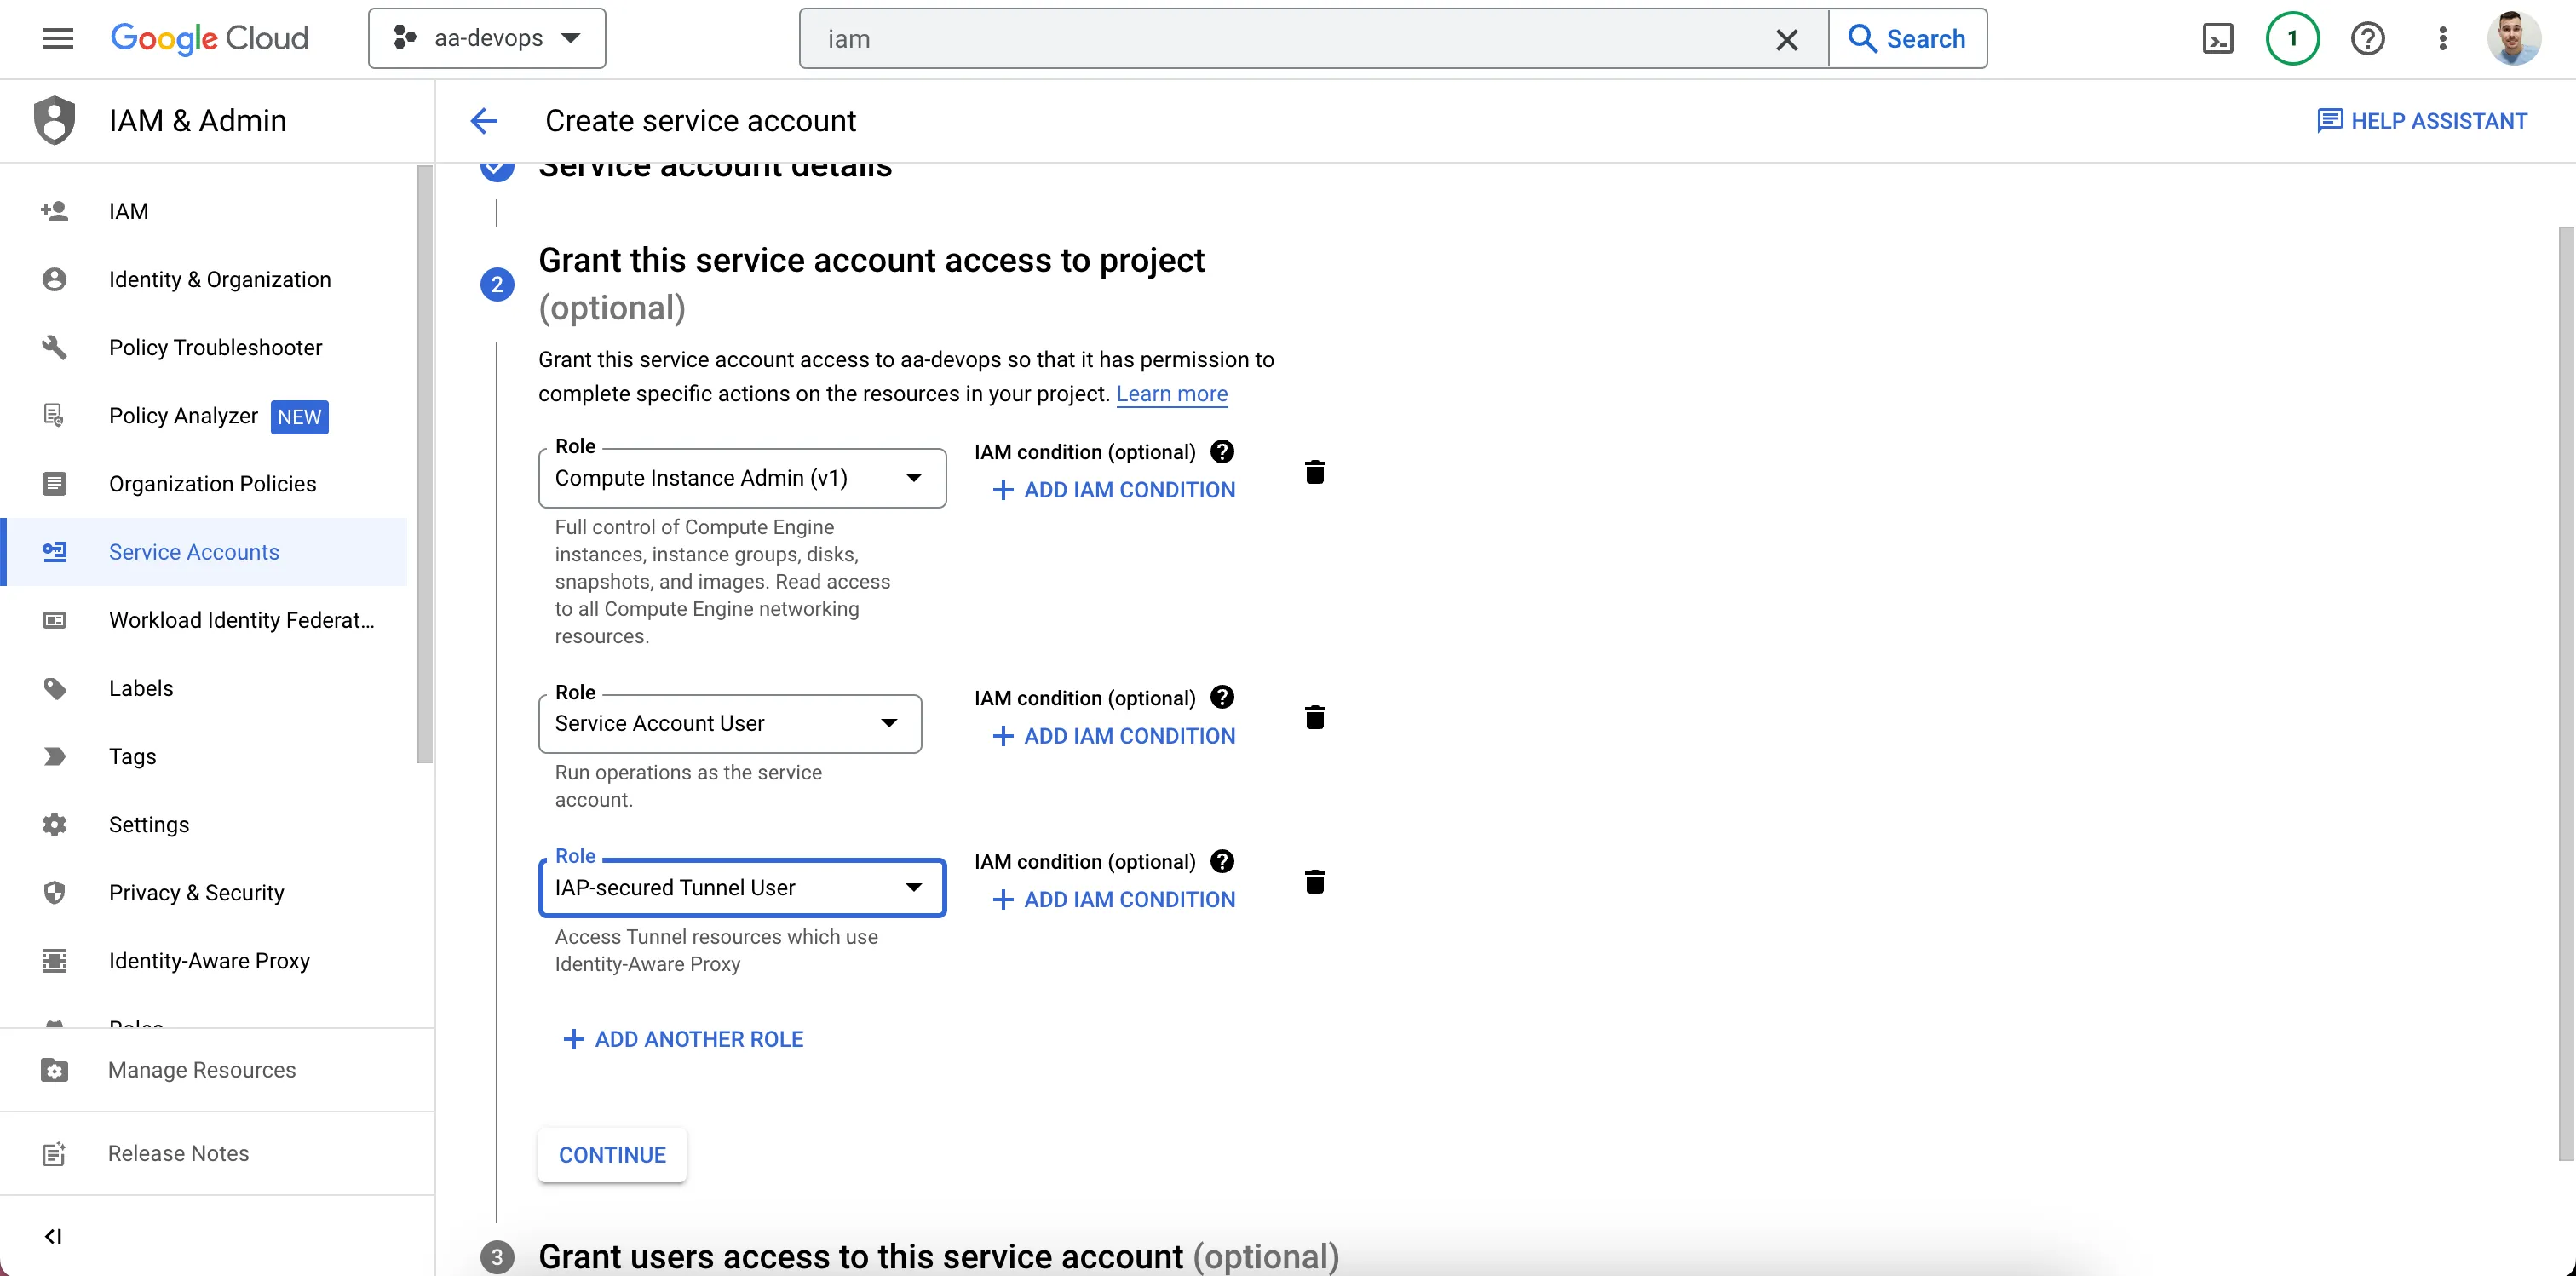
Add The Roles
- Done. (you can skip step 3)
- Create a Key for the Service Account and Save It.
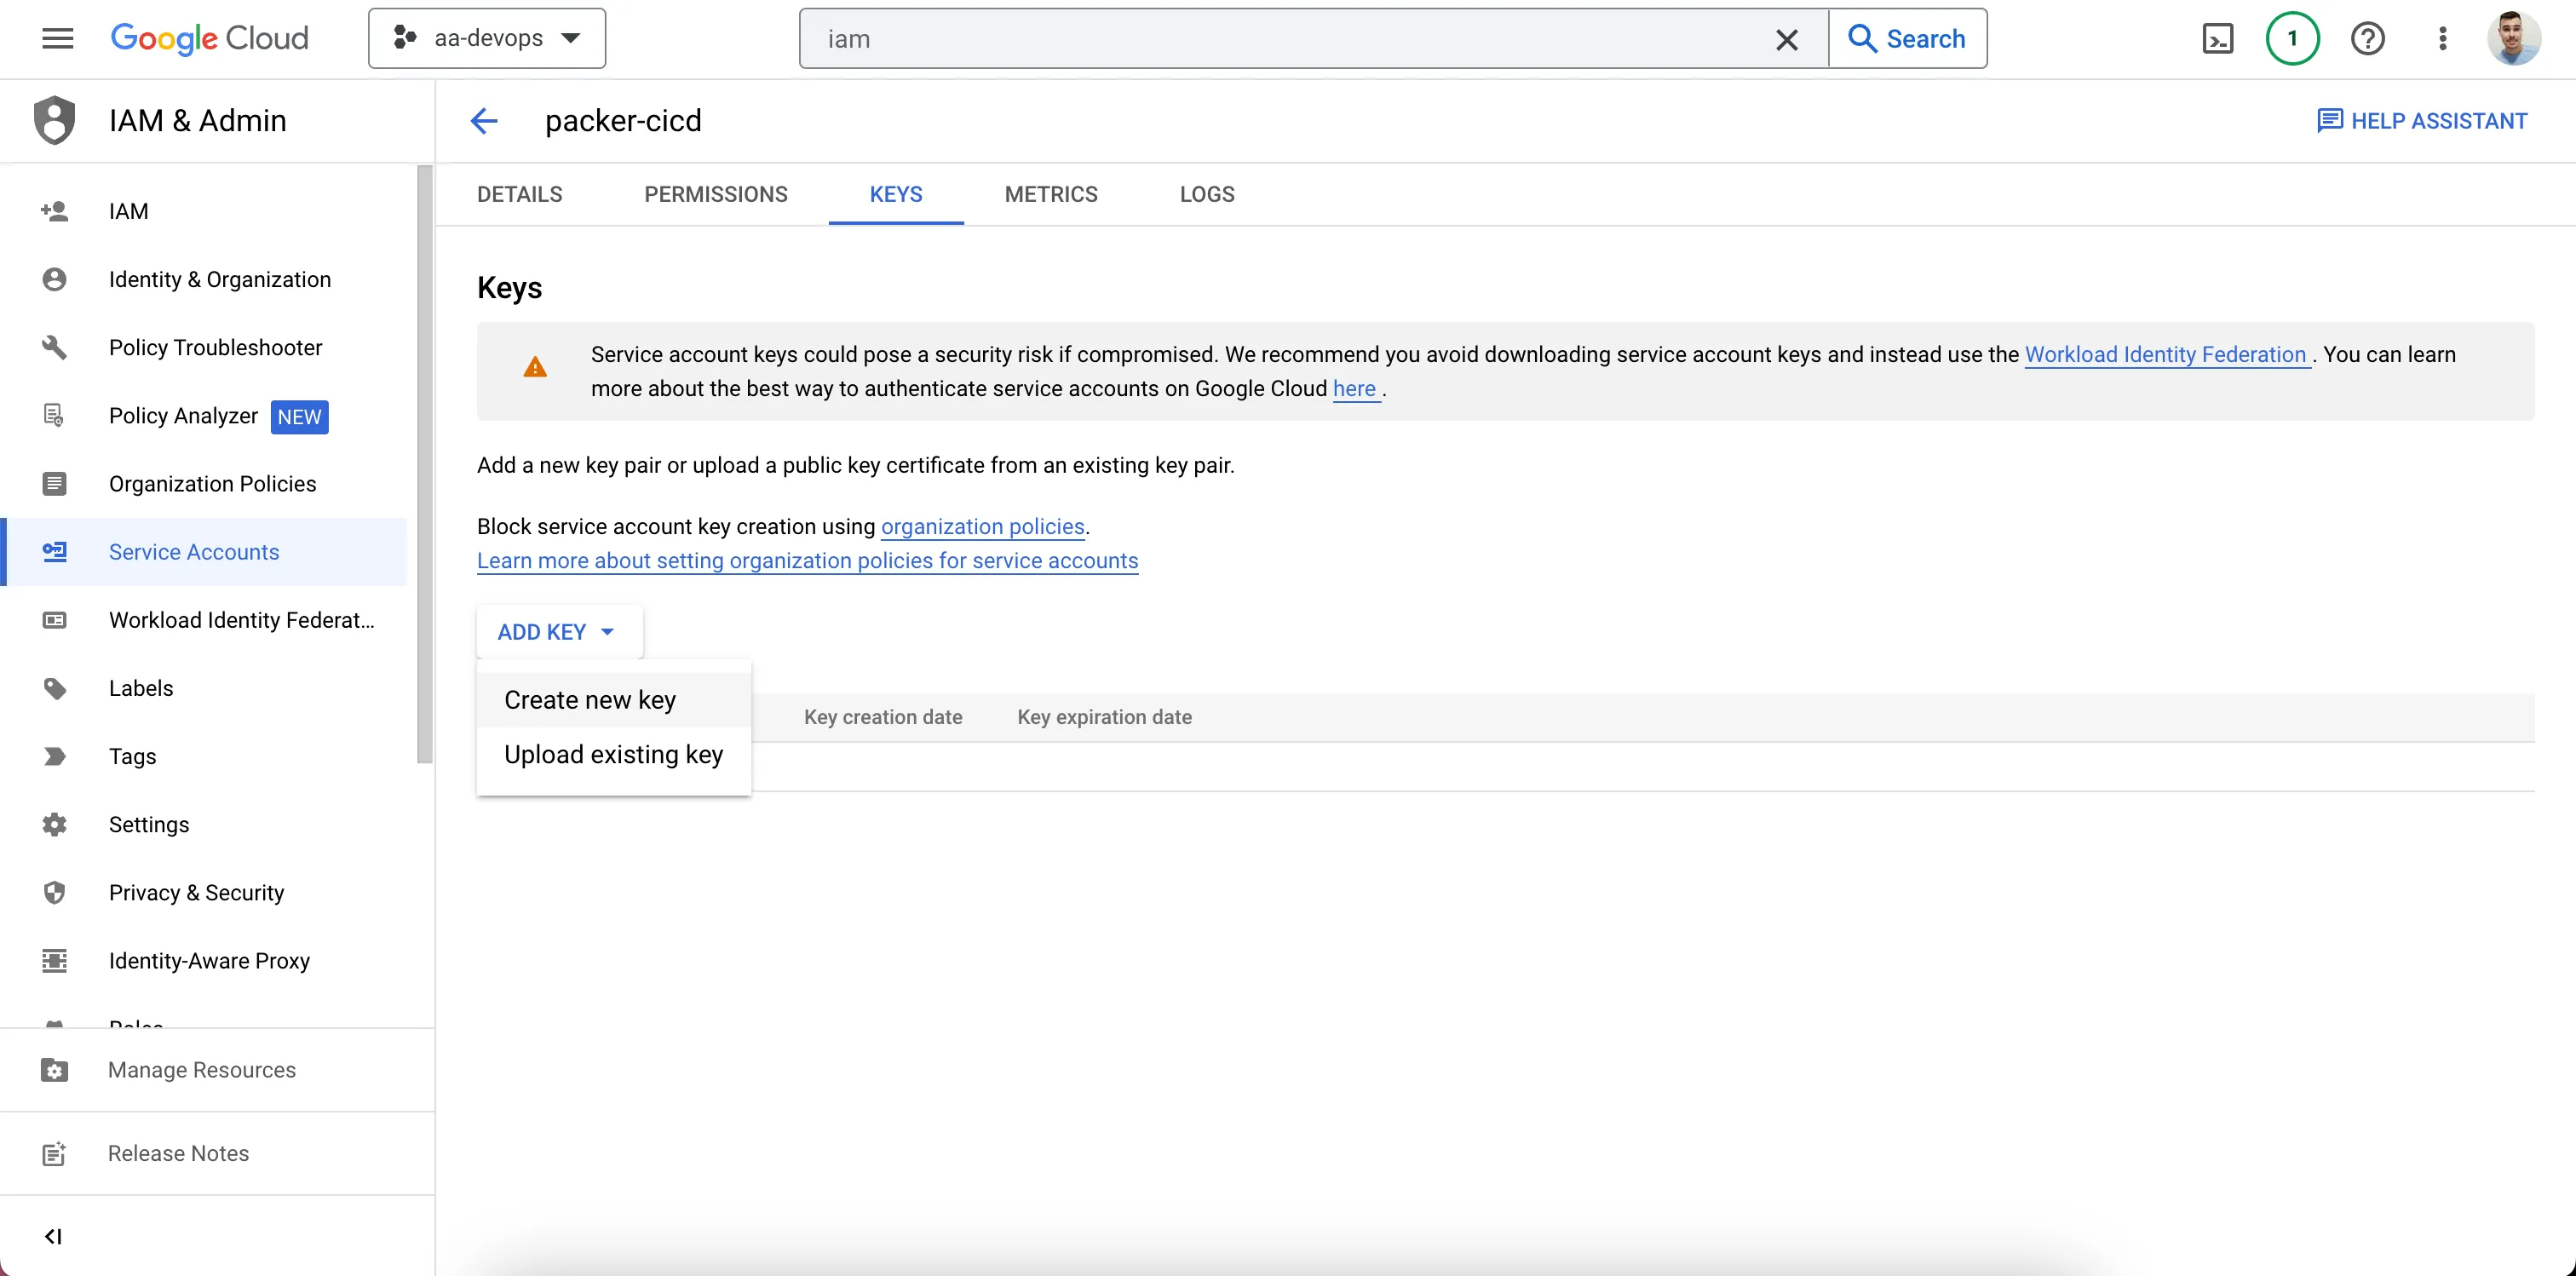
Create a JSON Key in the Keys Section
Code
Now, let’s code. In this example, we are going to create a Prometheus image. The image below shows an idea of how to structure the repository.
- A subfolder per image
- Each subfolder containing at least two files: build.pkr.hcl and variables.pkr.hcl.
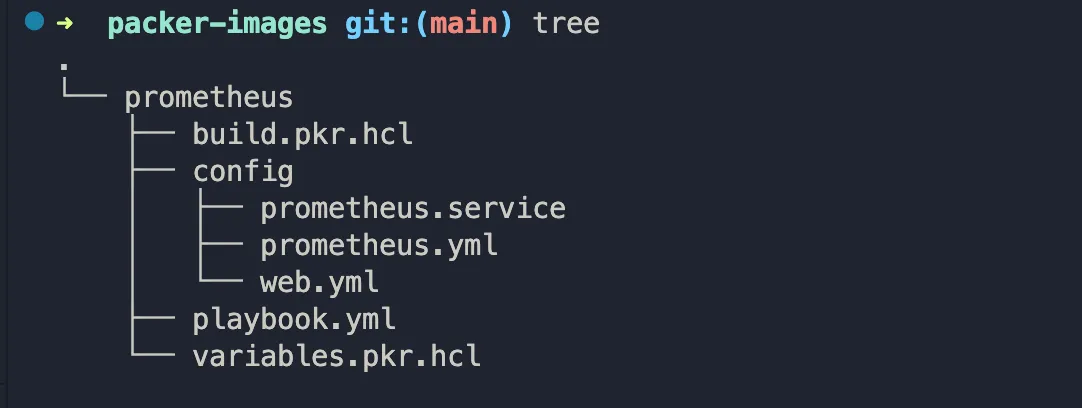
Folder Structure
Disclaimer I know today there are a lot of Managed Prometheus Services available to use, I just decided to create a Prometheus machine for example purposes only.
The code below it’s an example of the minimum configuration to follow. But before, some important considerations:
- To track the image metadata in Hashicorp Cloud, we need to add the block hcp_packer_registry, giving suitable values.
- For GCP, it’s important to disable use_proxy in the Ansible block, if not, you can face some issues when Ansible tries to establish a connection with the machine.
- Packer Cloud will only store the metadata of the images. build.pkr.hcl
locals {
  timestamp = regex_replace(timestamp(), "[- TZ:]", "")
}

source "googlecompute" "prometheus-image" {
  project_id          = var.project_id
  zone                = var.zone
  source_image_family = "centos-7"
  image_name          = "packer-prometheus-${local.timestamp}"
  image_description   = "Prometheus Web Server"
  ssh_username        = "packer"
  tags                = ["packer"]
}

build {
  sources = ["sources.googlecompute.prometheus-image"]

  hcp_packer_registry {
    bucket_name = "packer-prometheus-images"
    description = "Bucket used to store Prometheus images metadata"
  }

  provisioner "ansible" {
    playbook_file = "./playbook.yml"
    use_proxy     = false
  }
}
variable project_id {}
variable zone {}
And then, create the playbook file (see it in Github).
Pipeline
About the pipeline, we can create a feature-based one. For that, we have some important considerations too:
- The official Hashicorp Packer container image doesn’t have Ansible installed, and it lacks binary tools to help us customize the image. So, we should create a custom one. Here is an example of how we can do it:
FROM --platform=amd64 python:3.9.16

RUN wget -q https://releases.hashicorp.com/packer/1.8.5/packer_1.8.5_linux_amd64.zip && \
    unzip packer_1.8.5_linux_amd64.zip && \
    mv packer /usr/local/bin && \
    python3 -m pip -q install ansible

ENTRYPOINT [ "/bin/bash" ]
Then, tag and publish in your repo.
- We have to define three variables in our GitHub Secrets: the Client ID and Secret of the Hashicorp Service Principal configured before, and our Service Account JSON key. Then, just use it in the pipeline as in the example below.
- Packer will use a VM in GCP to execute the Ansible commands and create the image, at the final or if some error occurs, that VM will be destroyed. So, be careful in your pipeline if you are using a matrix like me to execute the build in parallel for don’t enable the fail-fast. Packer has good error handling, but if some parallel jobs fail when fail-fase is enabled, all the other ones will receive a force kill, making the error handling doesn’t work, and then the instances created by Packer will not be destroyed, and of course, we don’t wanna have any billing surprises.
Now, let’s define our code:
name: Build and Publish VM Image

on:
  push:
    branches:
      - main

env:
  HCP_CLIENT_ID: ${{ secrets.HCP_CLIENT_ID }}
  HCP_CLIENT_SECRET: ${{ secrets.HCP_CLIENT_SECRET }}

jobs:
  build:
    runs-on: ubuntu-20.04
    container:
      image: andersondarioo/packer-ansible:1.0.0
    strategy:
        matrix:
          subfolder: [ prometheus ]
        fail-fast: false

    steps:
    - name: Checkout
      uses: actions/checkout@v3

    - name: 'Authenticate to Google Cloud'
      uses: 'google-github-actions/[email protected]'
      with:
        credentials_json: '${{ secrets.GOOGLE_CREDENTIALS }}'

    - name: Build image
      run: |
        cd ${{ matrix.subfolder }}
        packer build -var "project_id=aa-devops" -var "zone=us-central1-a"
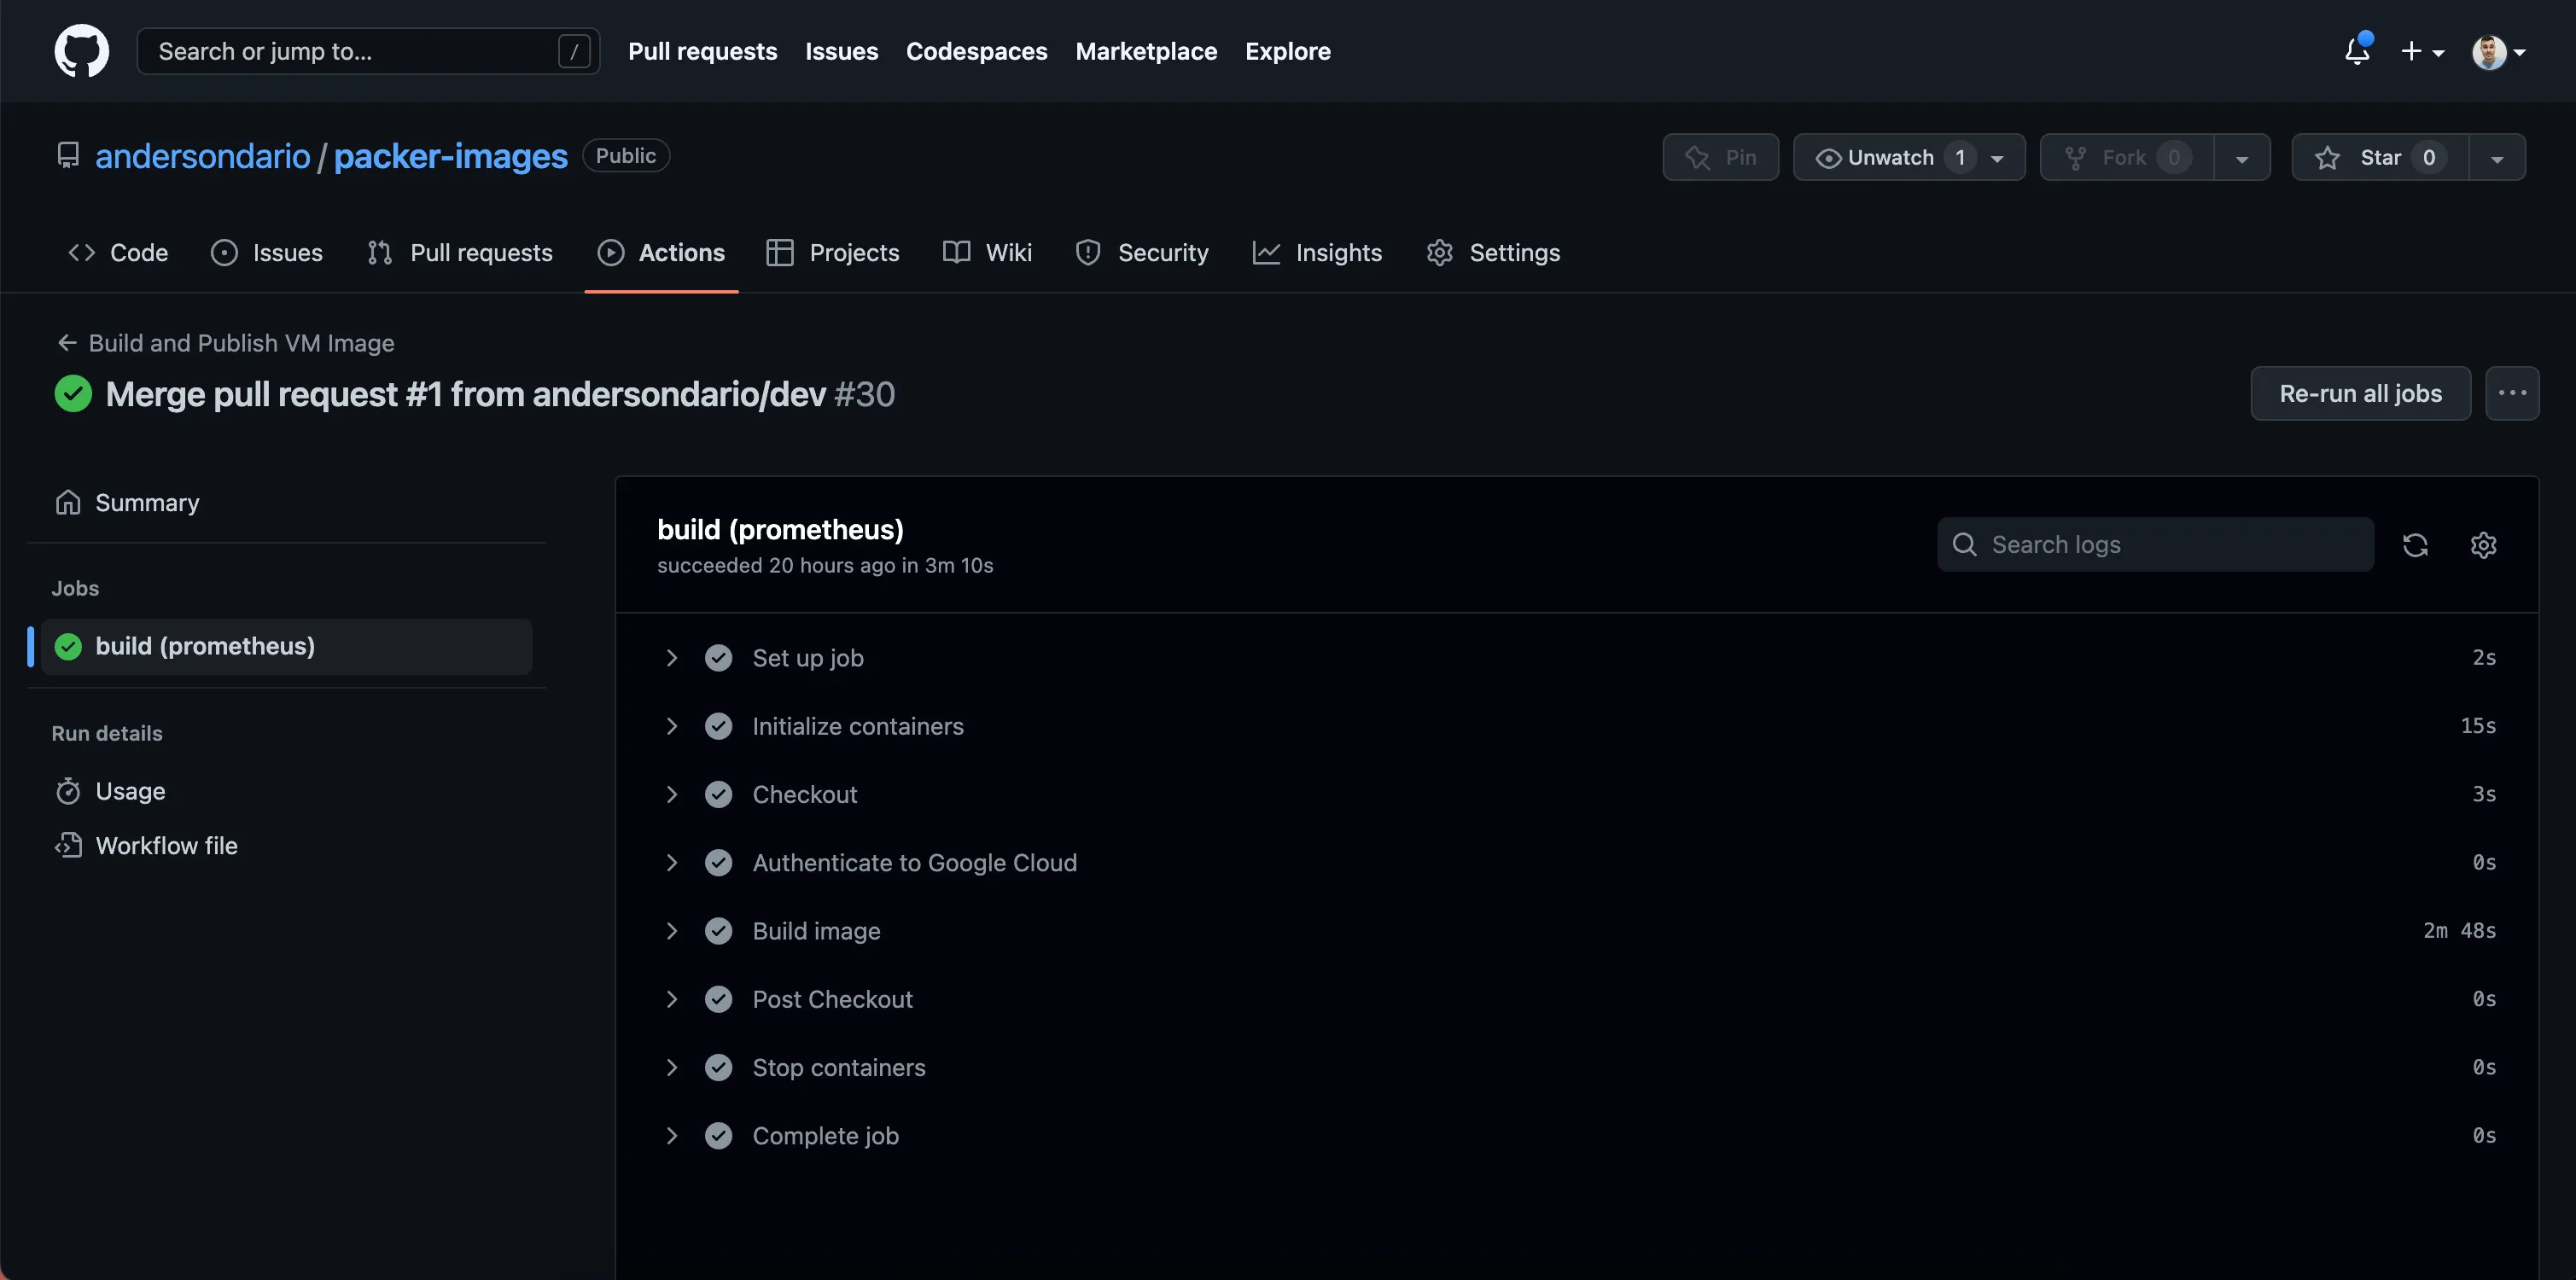
Main Workflow
name: Validate Pull Request

on:
  pull_request:
    branches:
      - main

env:
  HCP_CLIENT_ID: ${{ secrets.HCP_CLIENT_ID }}
  HCP_CLIENT_SECRET: ${{ secrets.HCP_CLIENT_SECRET }}

jobs:
  validate:
    runs-on: ubuntu-20.04
    container:
      image: andersondarioo/packer-ansible:1.0.0
    strategy:
        matrix:
          subfolder: [ prometheus ]
        fail-fast: false

    steps:
    - name: Checkout
      uses: actions/checkout@v3

    - name: Validate image
      run: |
        cd ${{ matrix.subfolder }}
        packer validate -var "project_id=aa-devops" -var "zone=us-central1-a" .
        packer fmt -check .
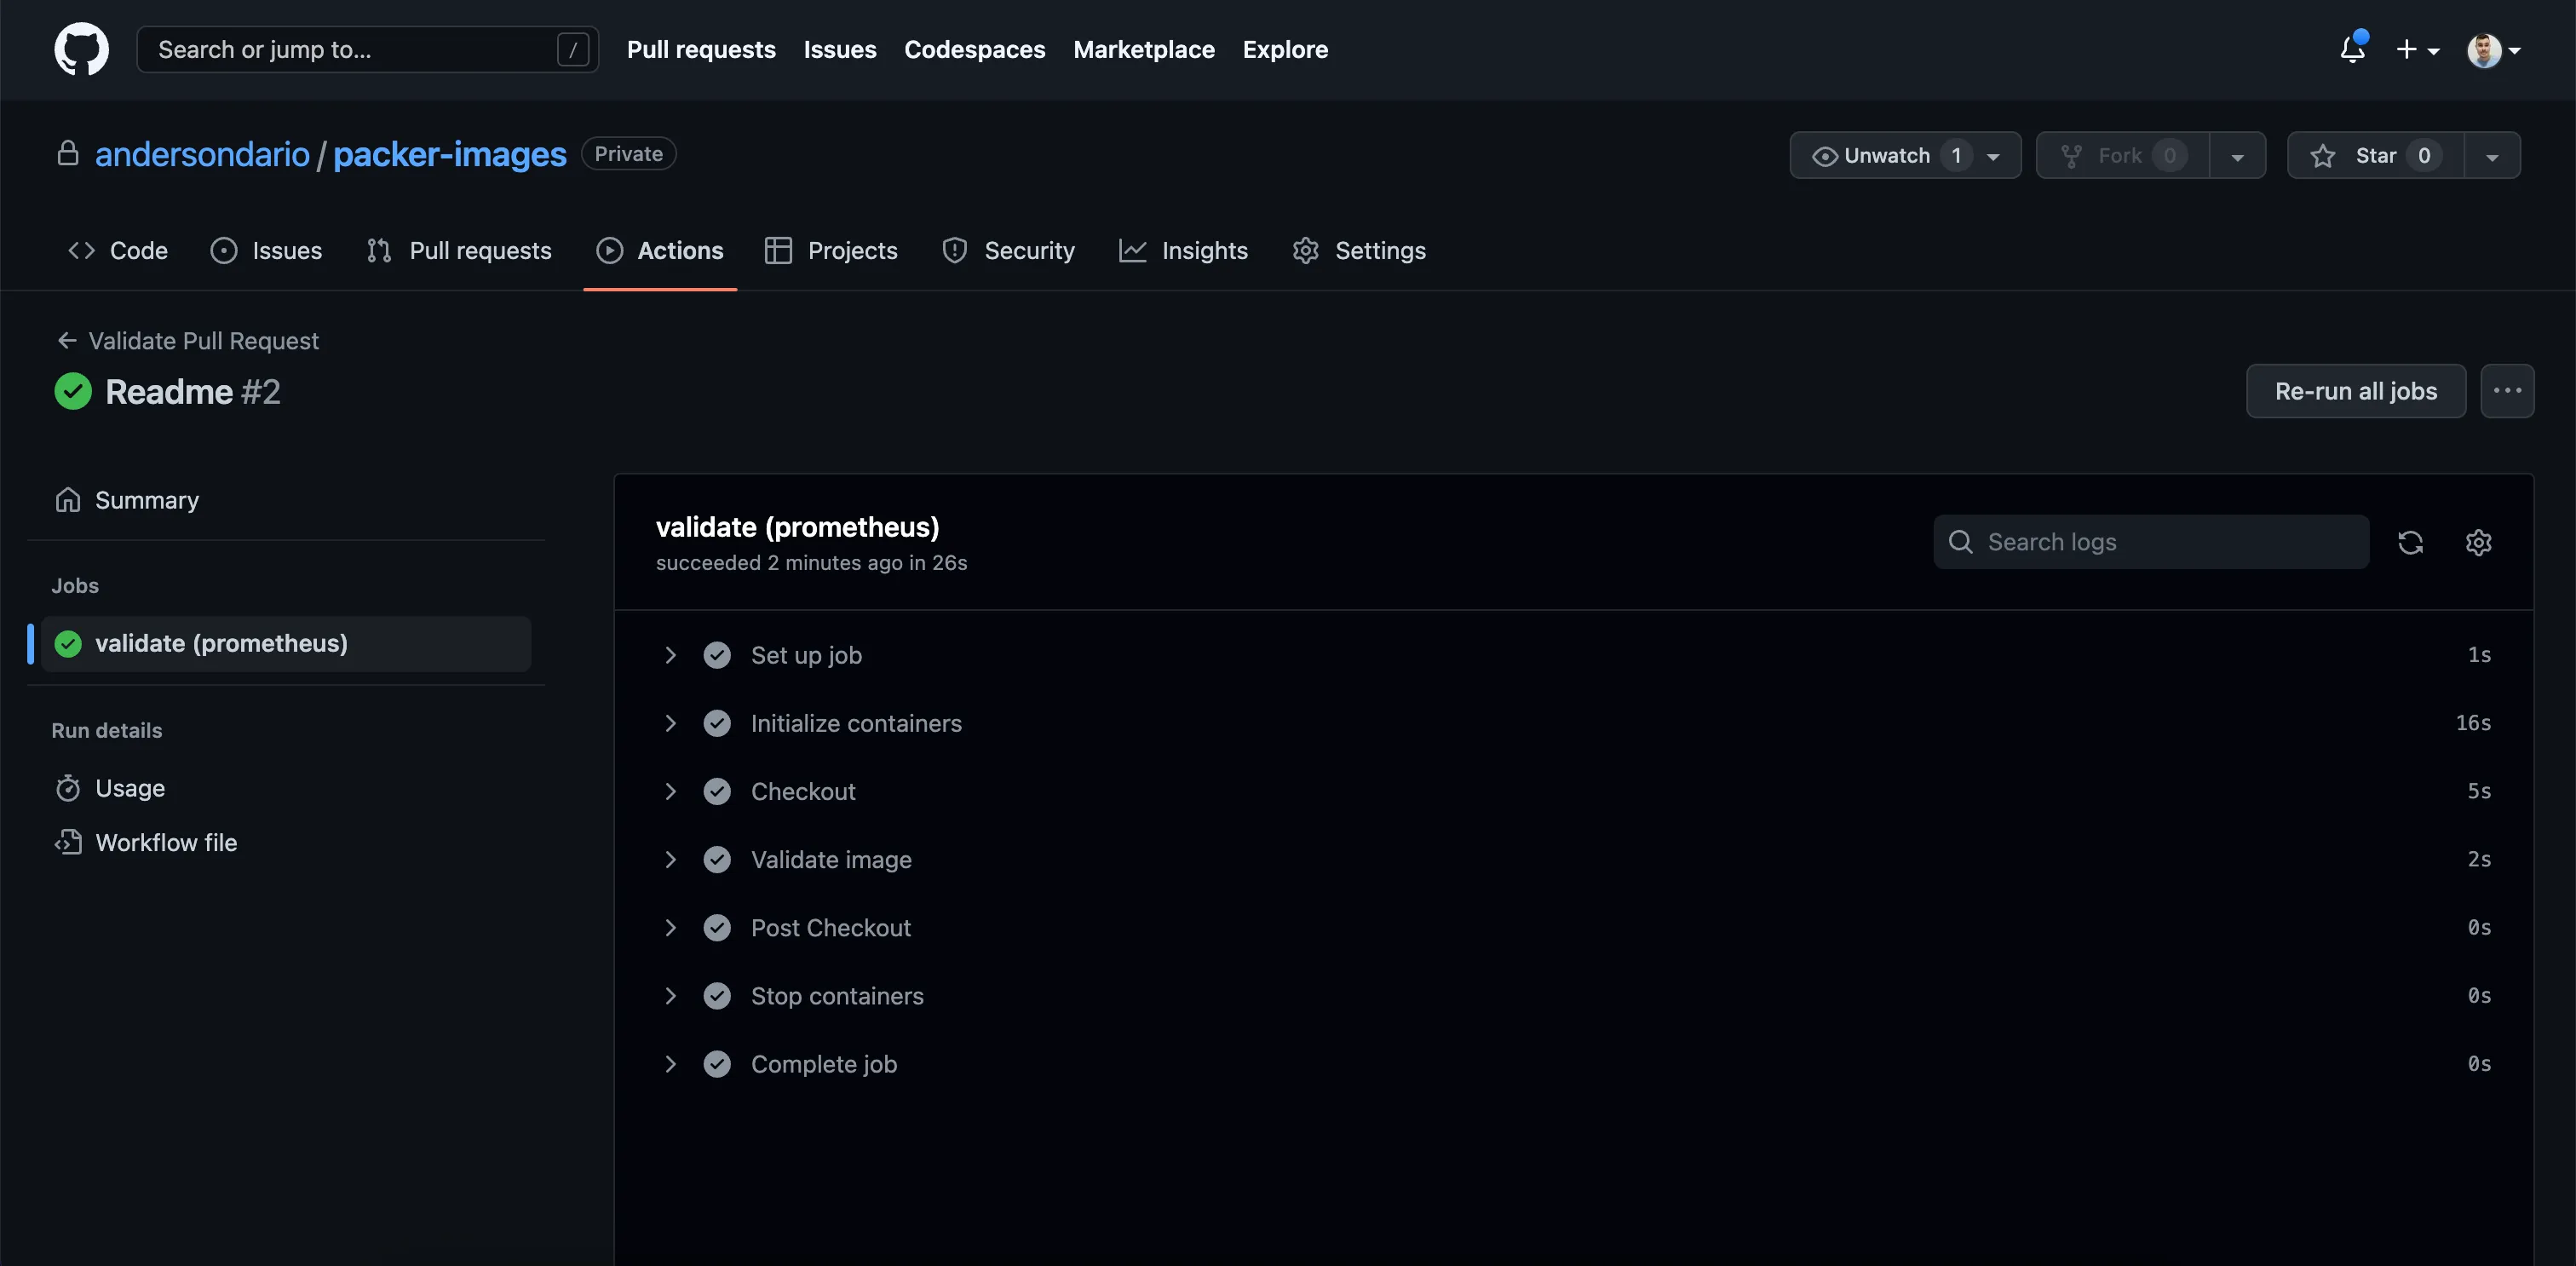
PR Workflow
Validating
Now, if we take a look inside Hashicorp Packer Cloud, we can see our image bucket metadata created:
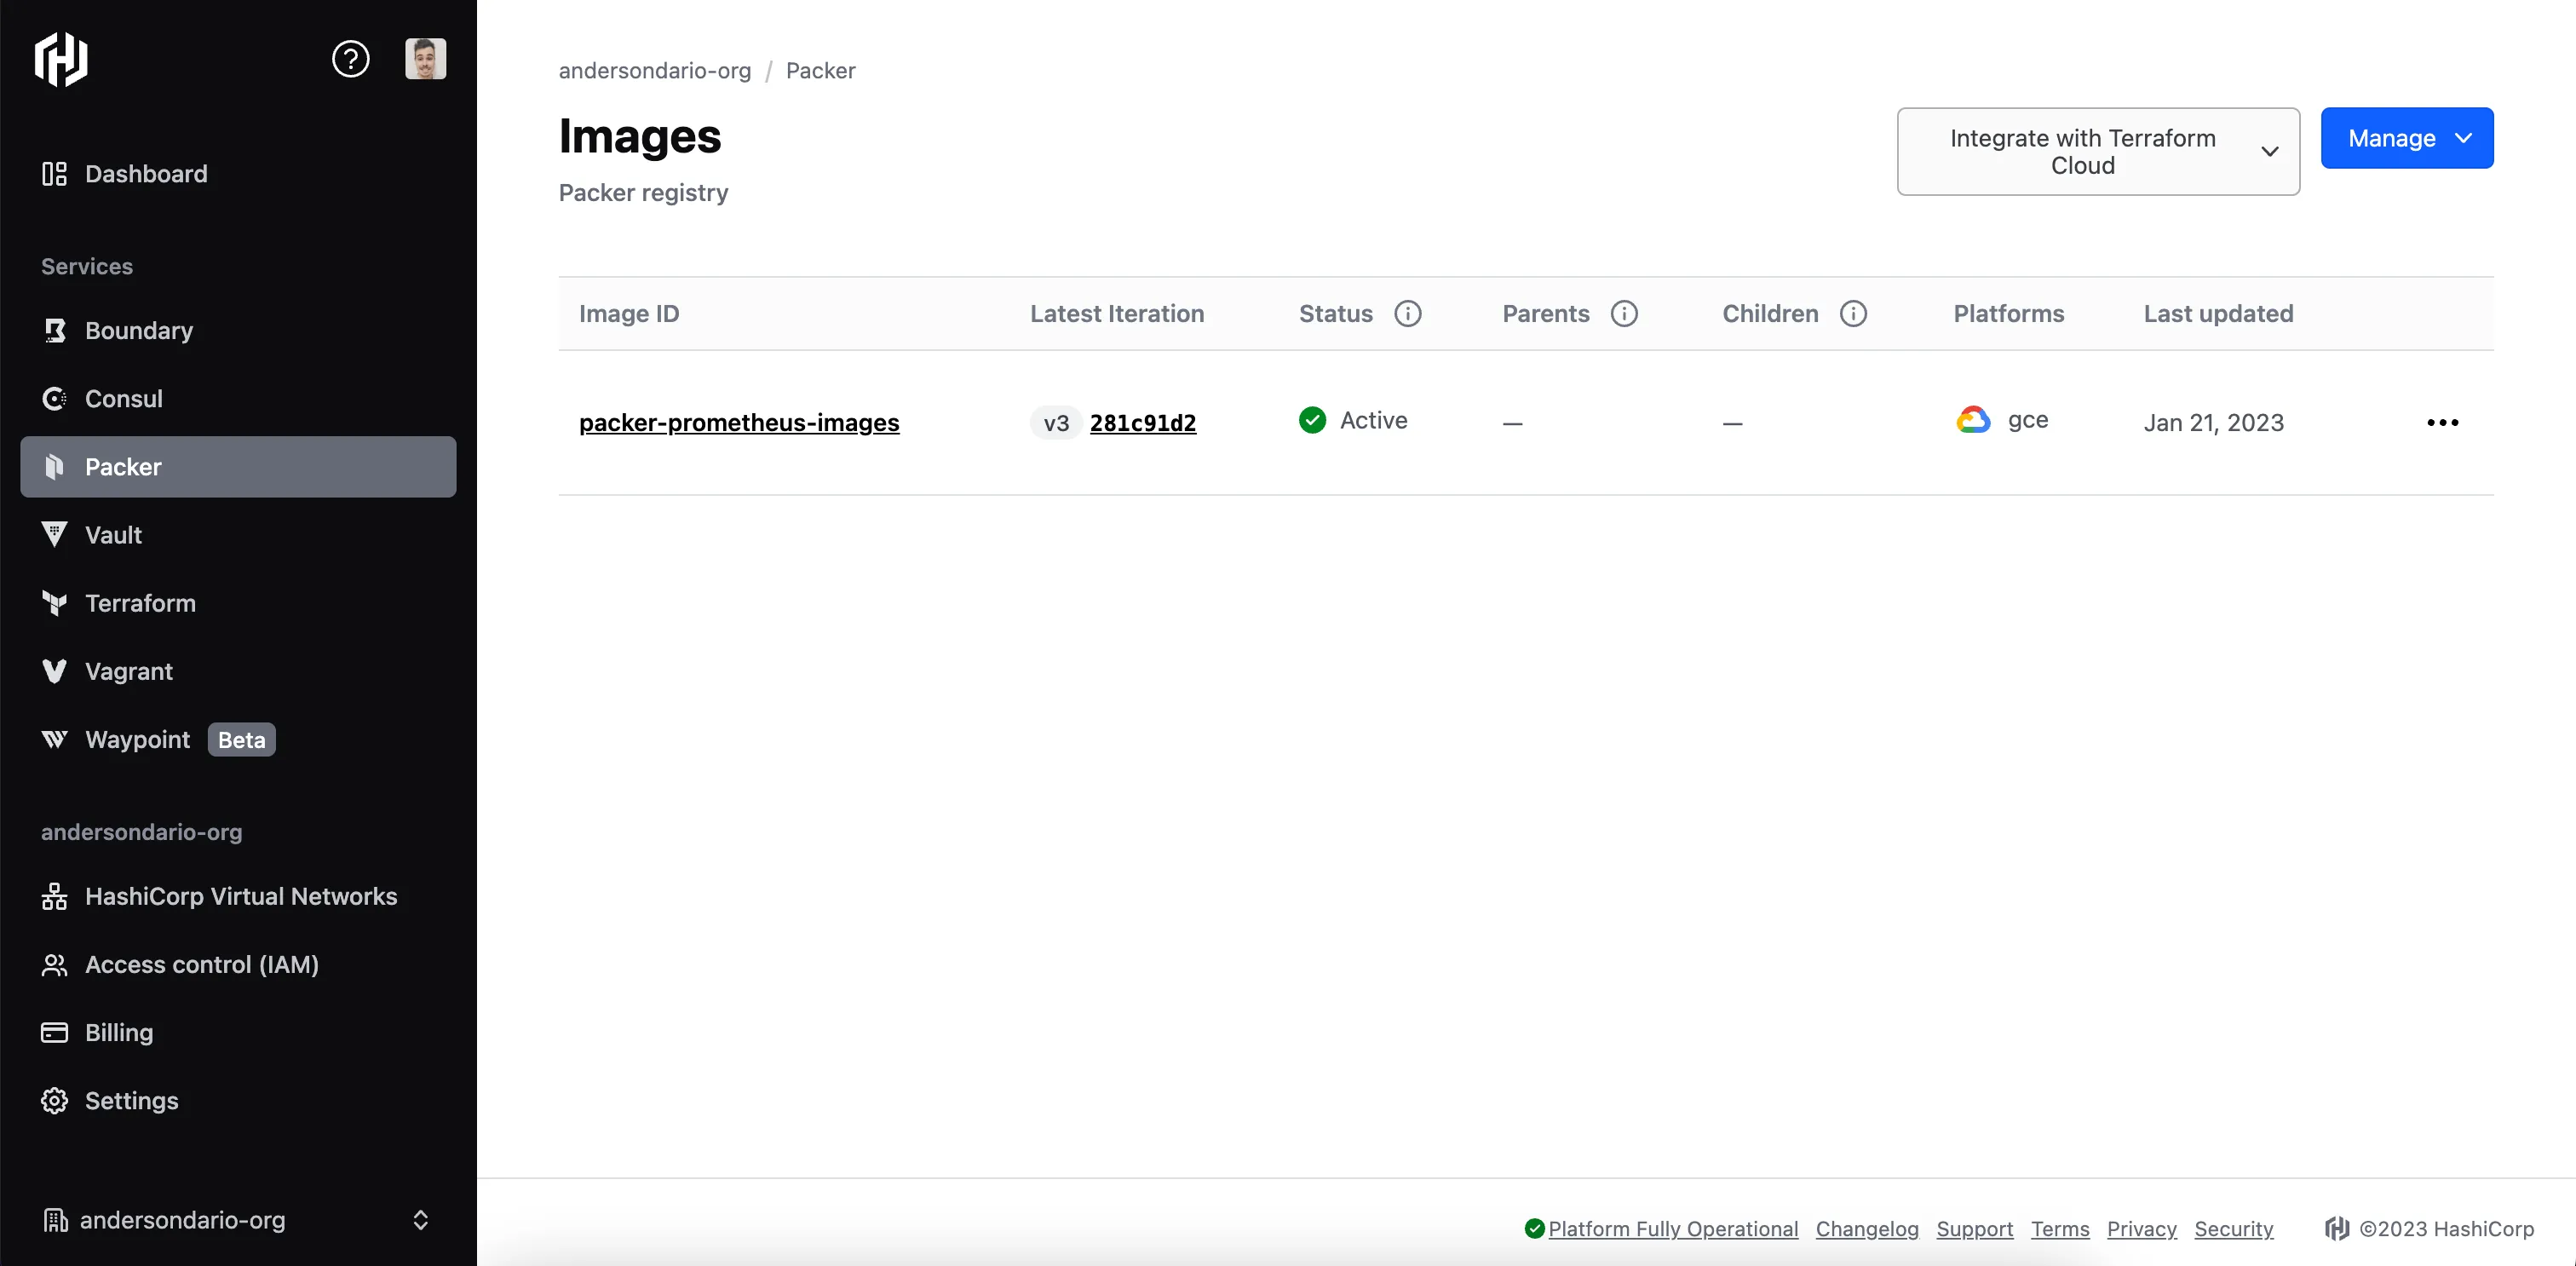
Image Metadata Published
And we can see also our image created in GCP:
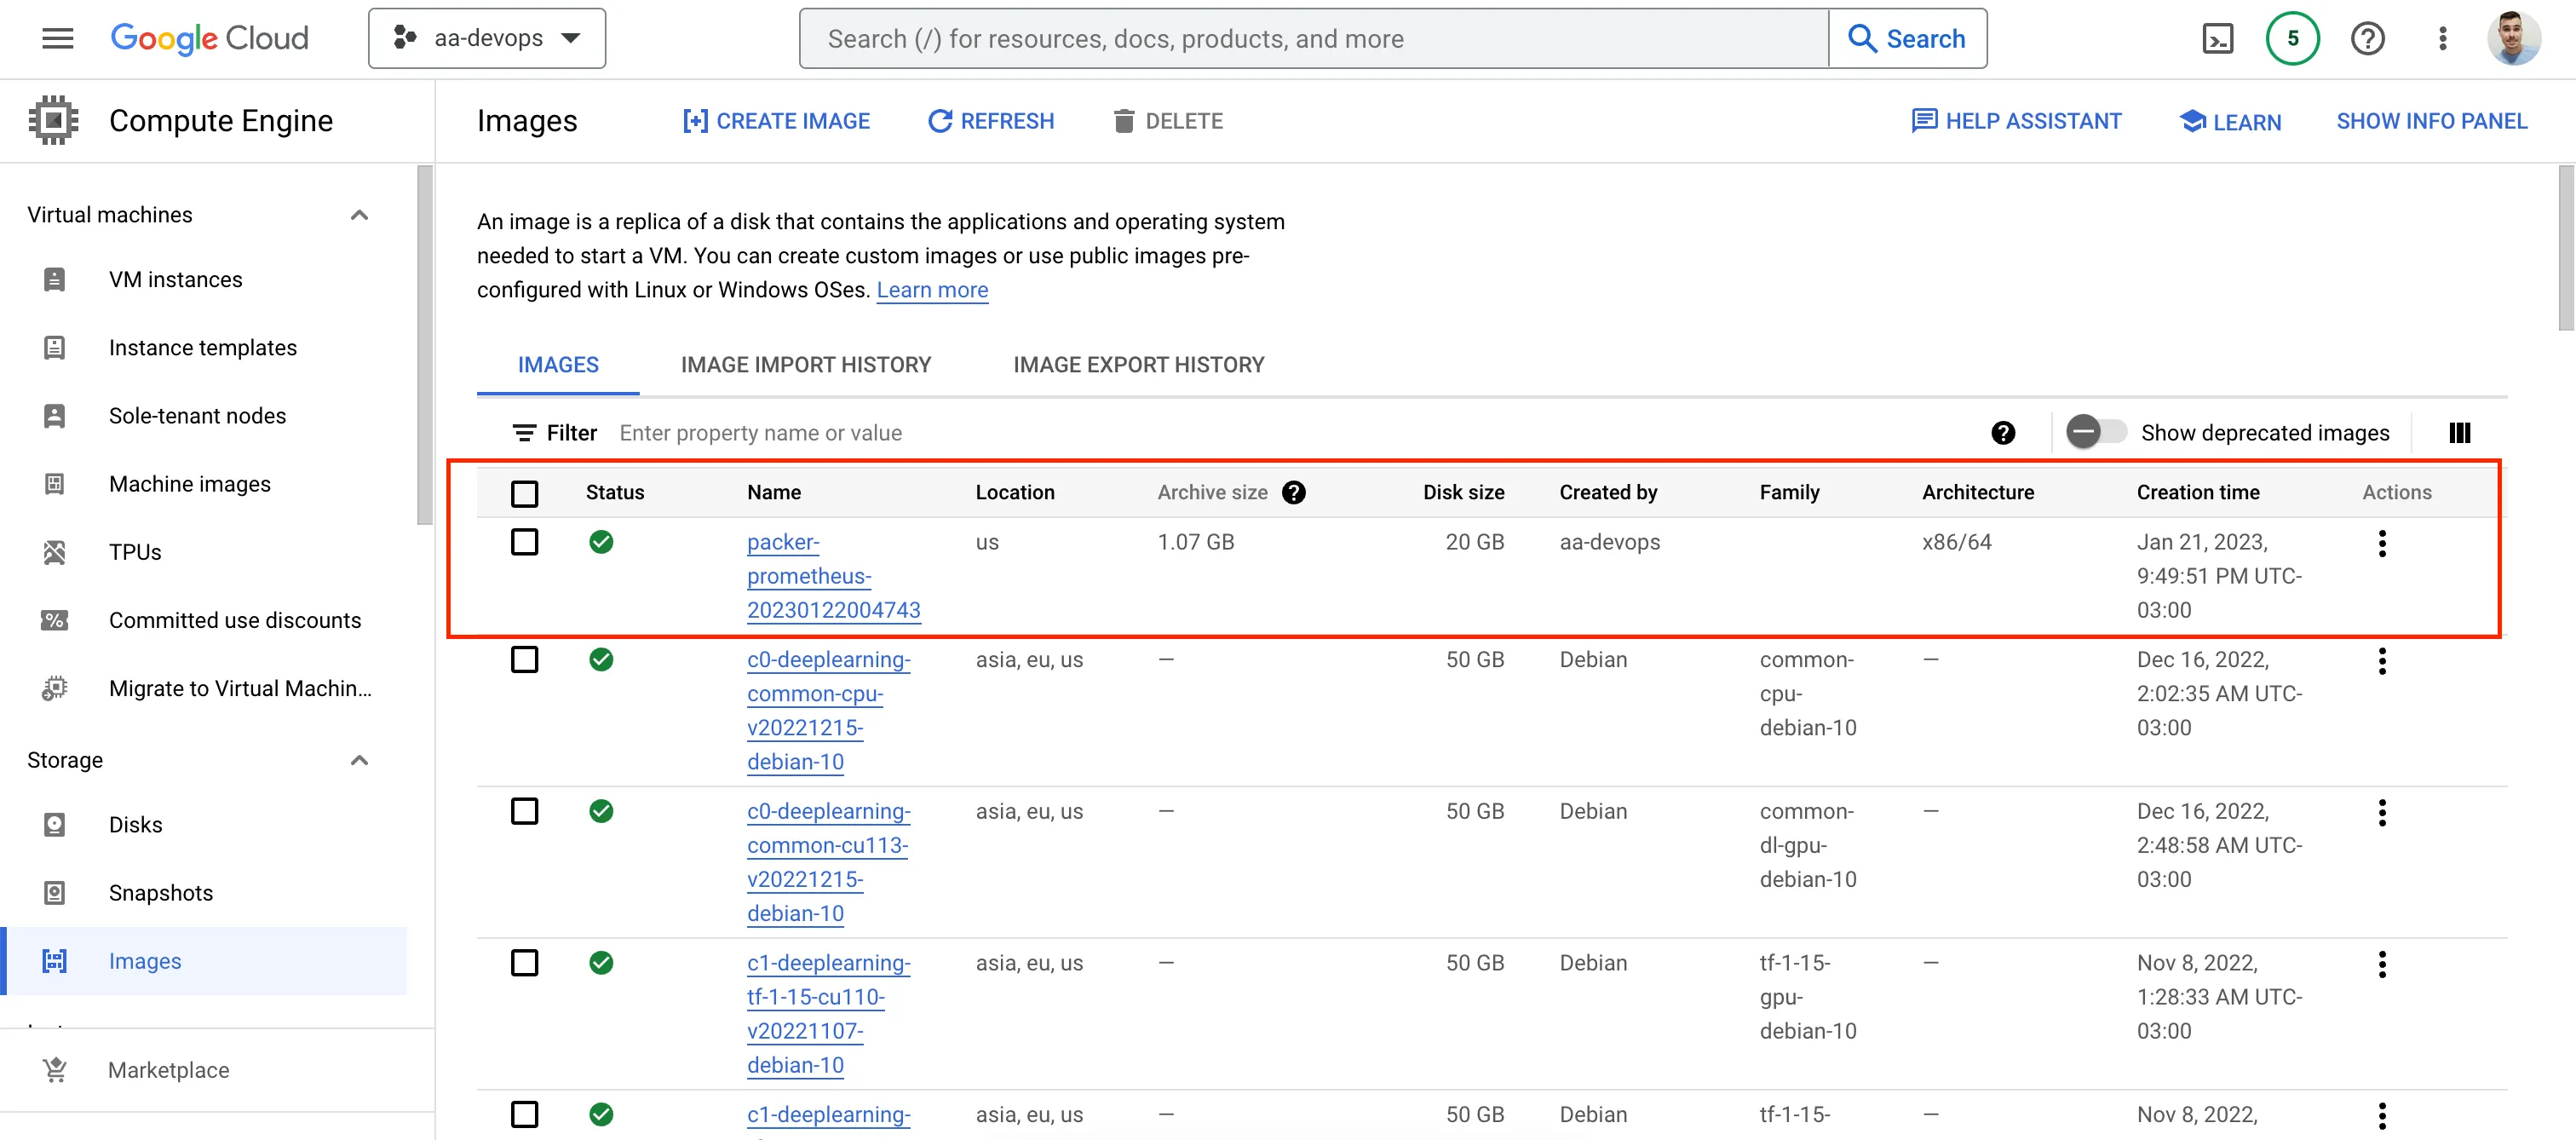
GCP Image
Now you can use the image.
If you would like to know how to configure Terraform Cloud and GCP to deploy the Packer images created here, please take a look at my next article: *Deploying Packer images to GCP using Terraform Cloud.*
Useful Links and References
Support
If you find my posts helpful and would like to support me, please buy me a coffee: Anderson Dario is personal blog and tech blog
That’s all. Thanks.