In the fast-paced world of DevOps, maintaining the delicate balance between speed and stability is crucial. GitOps, a modern approach to continuous deployment, has emerged as a game-changer by leveraging the power of version control and automation to manage infrastructure and application deployments. At the forefront of this movement is ArgoCD, a robust and user-friendly GitOps tool that simplifies the deployment and management of Kubernetes applications.
But what happens when your microservices architecture involves multiple clusters and environments, each with its own set of applications and configurations? This is where ArgoCD’s “App of Apps” concept comes into play. Using this approach, DevOps teams can achieve a higher level of control, scalability, and efficiency in managing complex Kubernetes deployments.
In this article, we will dive deep into the world of GitOps and explore how to implement ArgoCD’s App of Apps strategy to achieve comprehensive and streamlined application management.
 Stack Used
Requirements
- A Kubernetes Cluster.
- At least one repository, where we’ll store our configurations.
- A domain and SSL certificates if you want to expose your ArgoCD through your domain.
Architecture
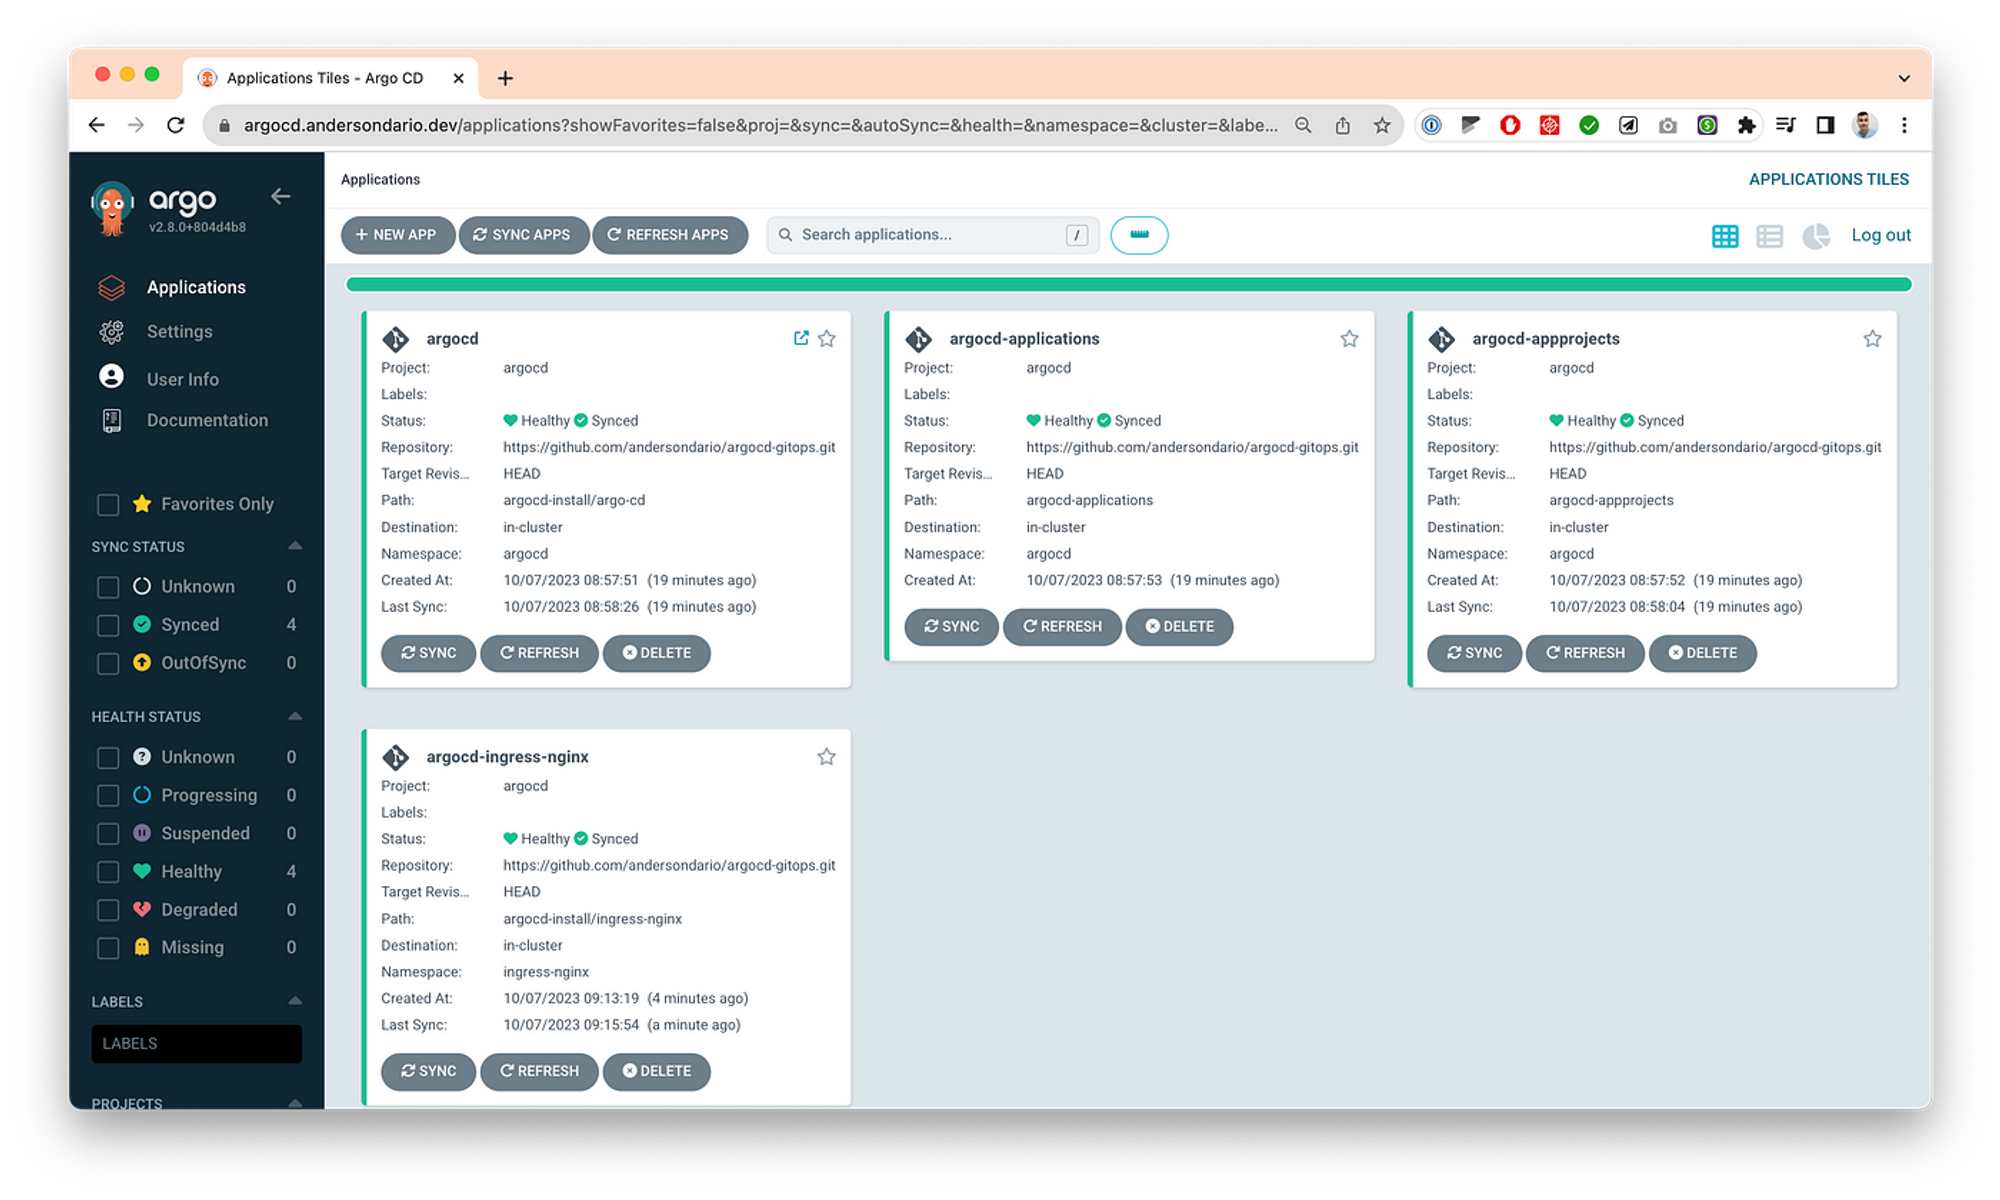
To implement an app-of-apps approach, we’ll need at least four apps that we’ll call “Core Apps”. Which are:
- argocd: application to manage the own argocd server. This application will point to the ArgoCD chart that we deployed.
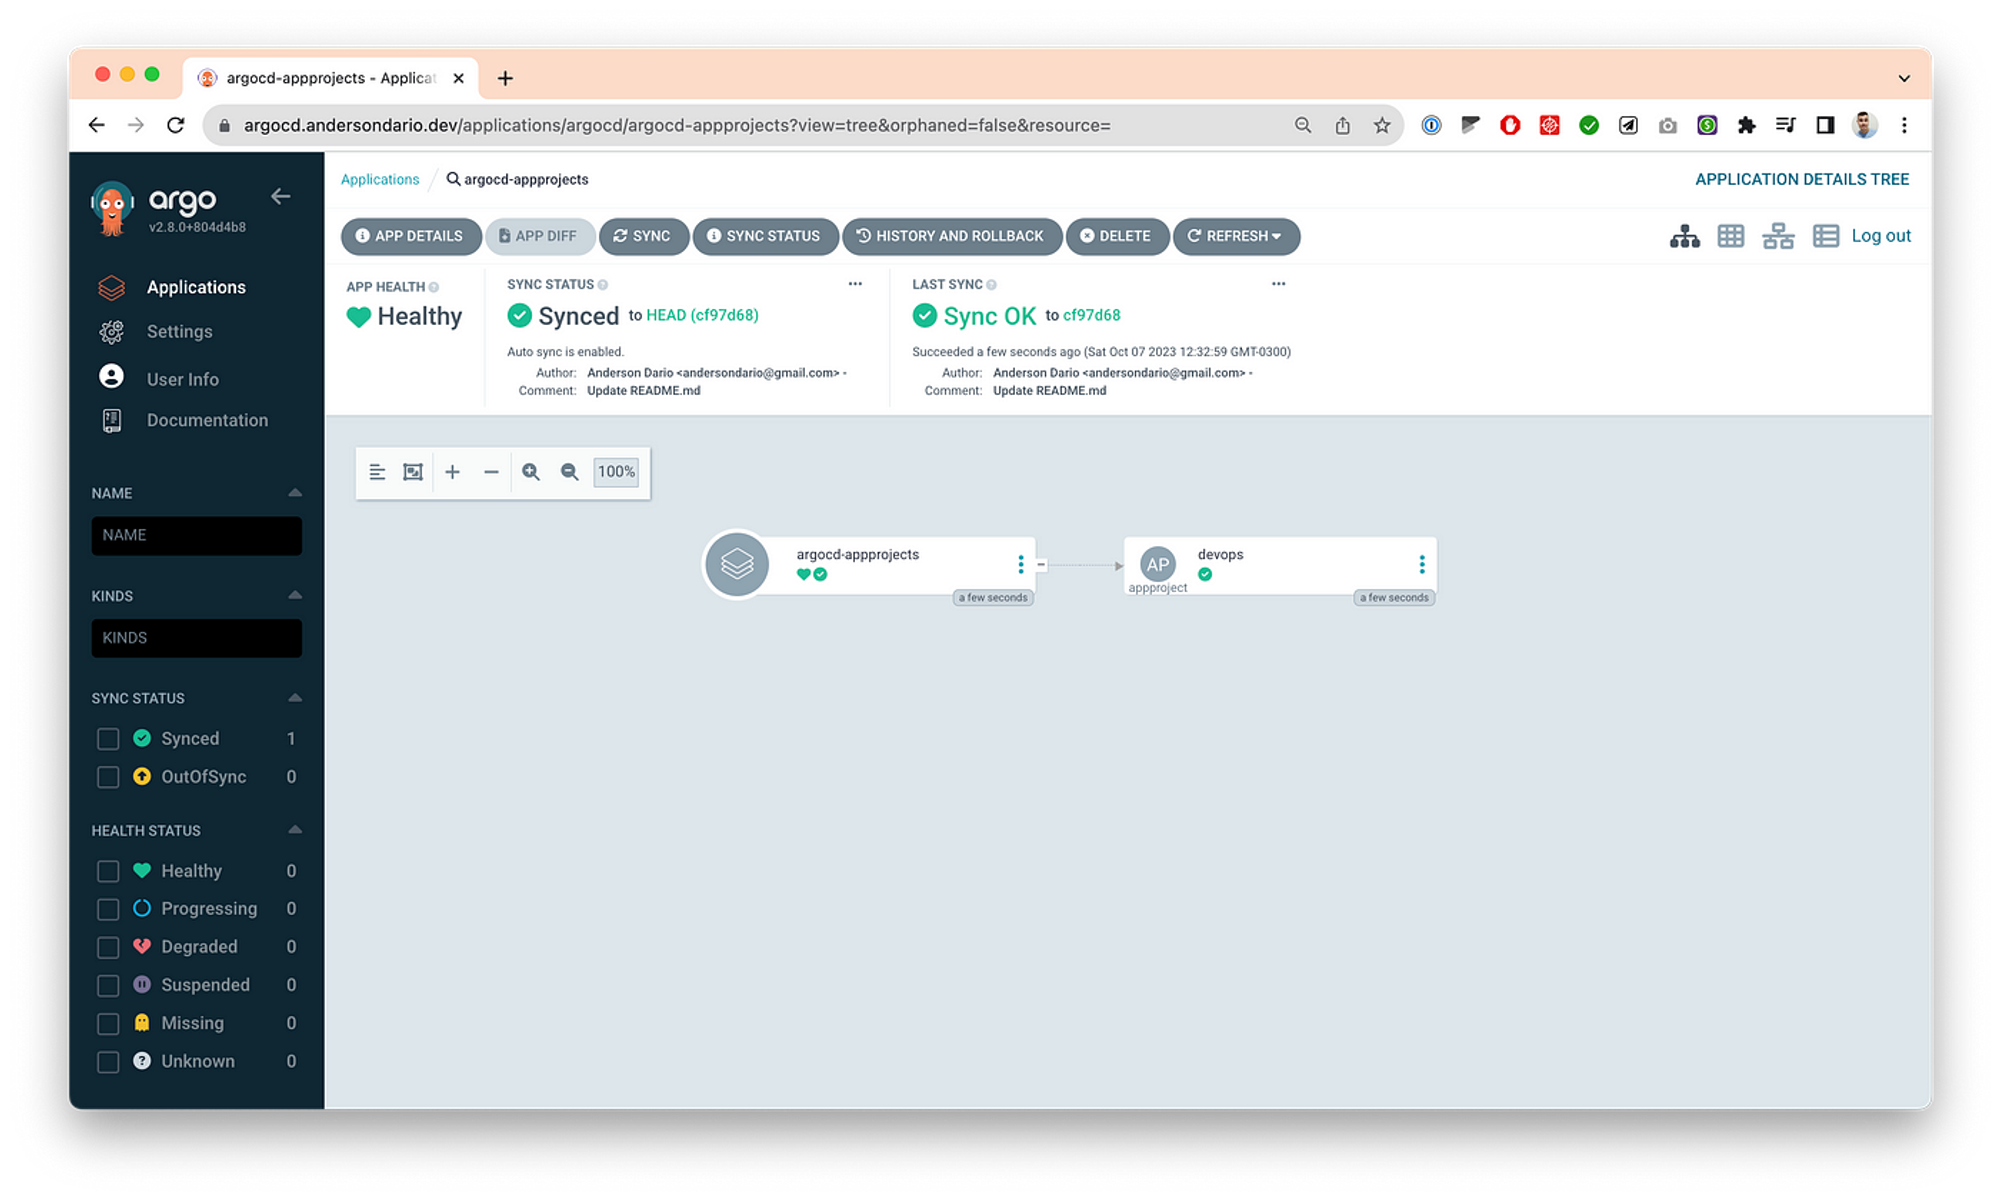
- argocd-projects: application to manage the AppProjects. This application will recursively identify all AppProjects that we’re going to define for our ArgoCD, to have a better organization of our projects and enforce some rules.
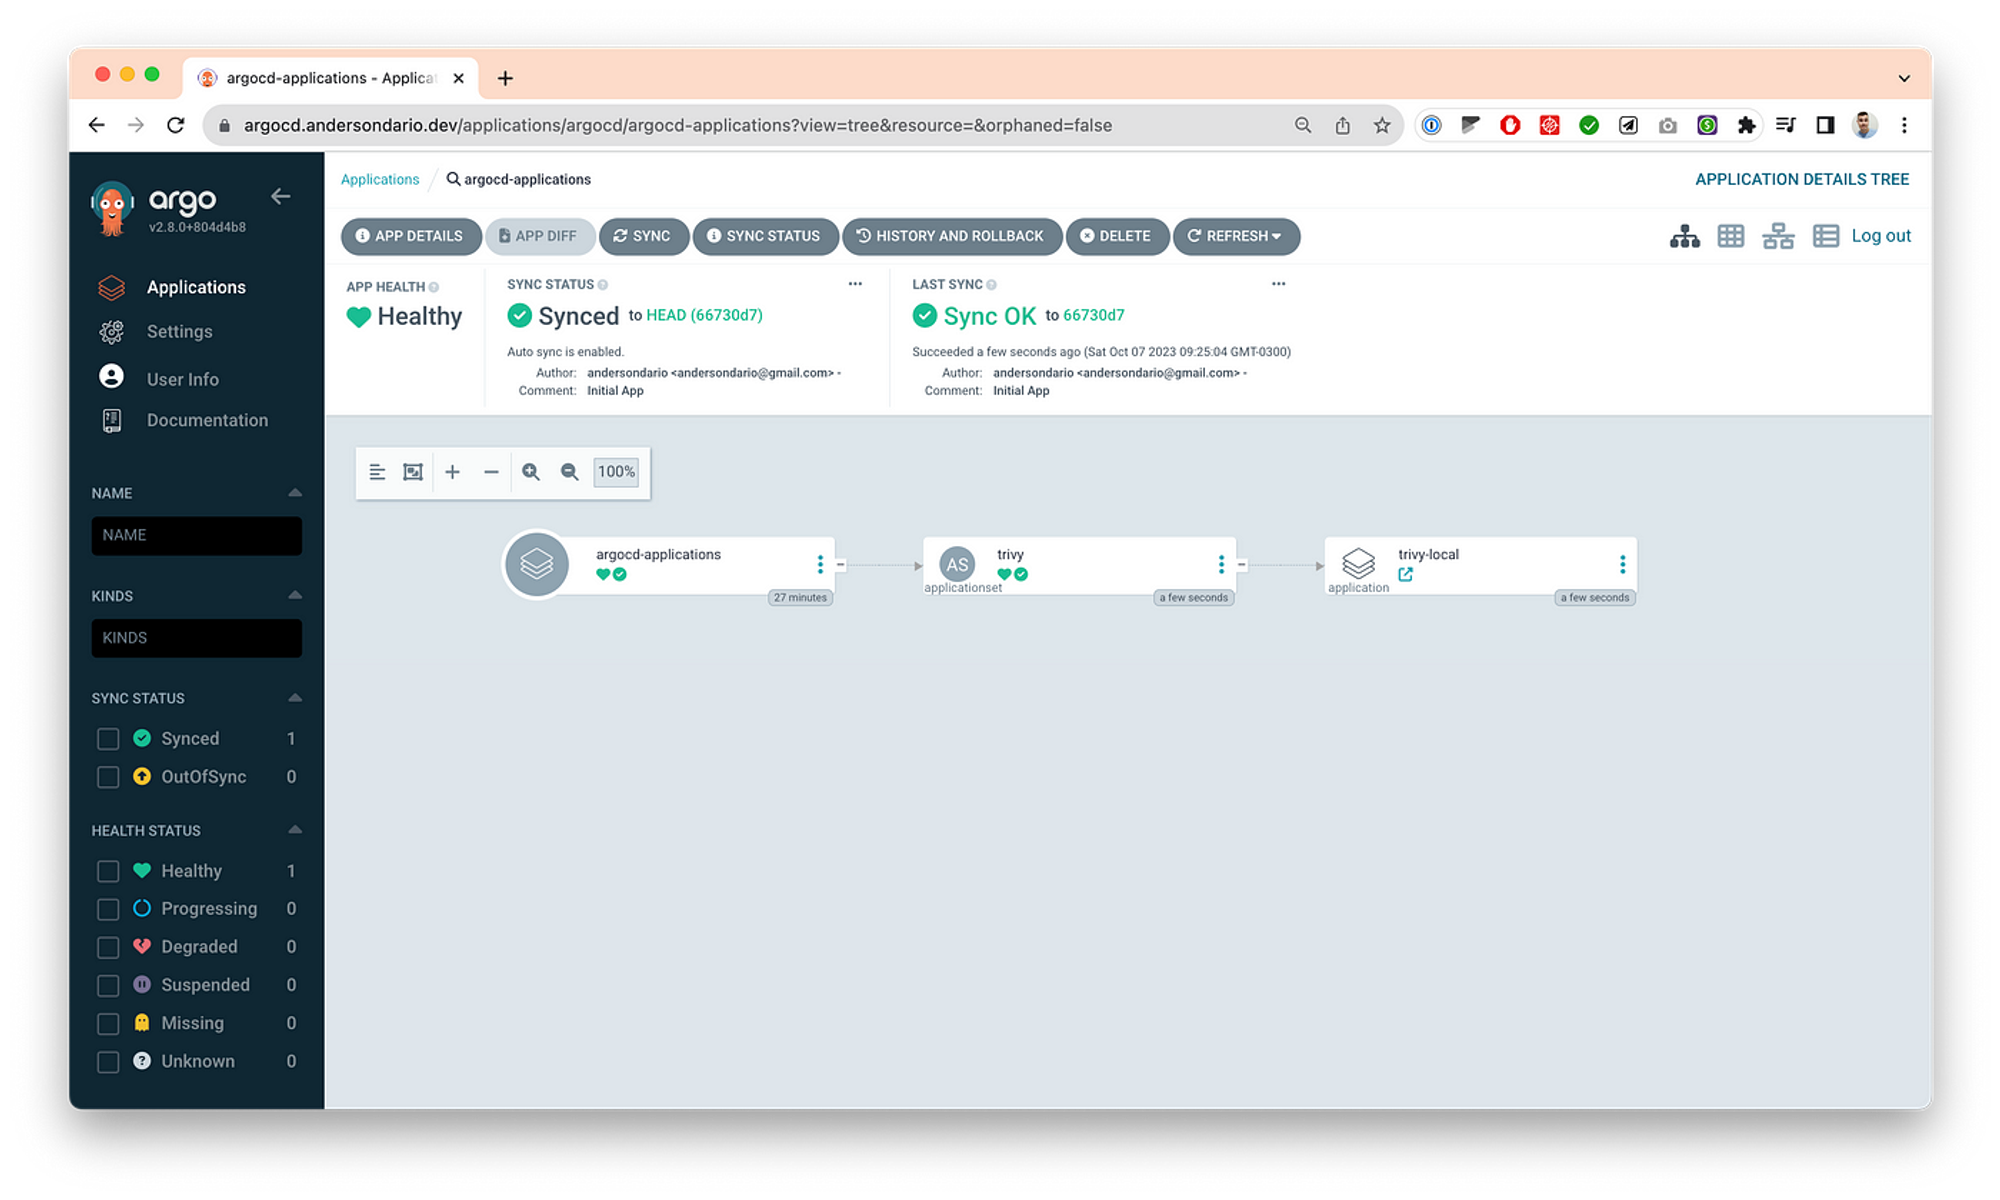
- argocd-applications: application to manage the ApplicationSets. This application will recursively identify all ApplicationSets that we’re going to define for the applications we want to deploy in our cluster.
Ideally, you should have a repository just to manage the ArgoCD, and many others for your application’s charts and values.
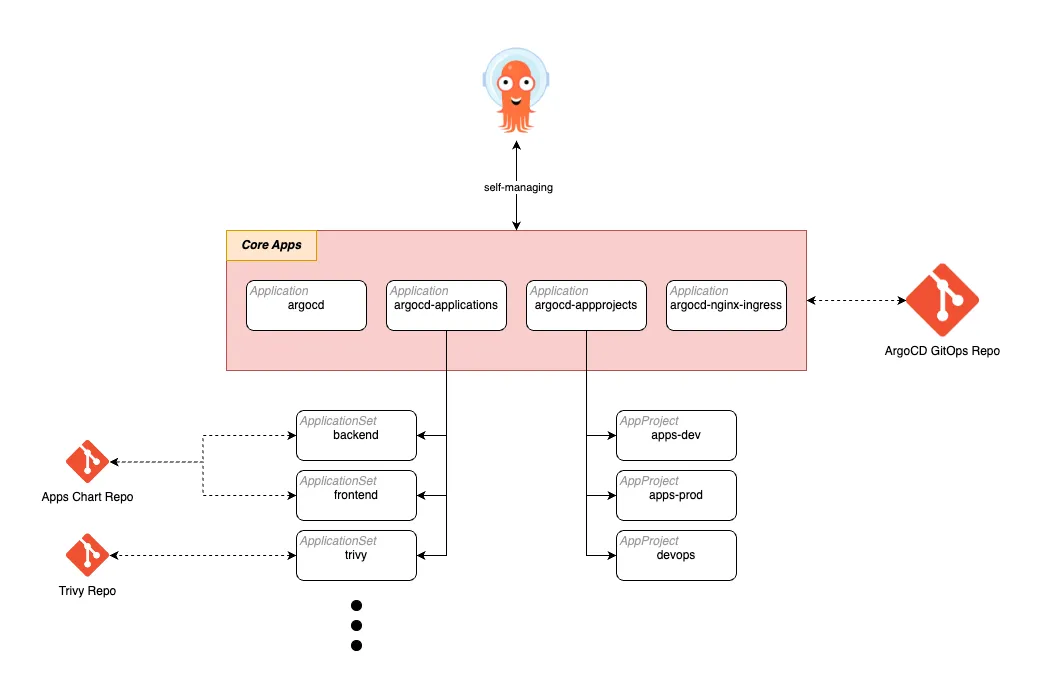
The diagram above is an example, you can imagine it with as many apps as you want, and also create custom apps to manage your own clusters. For example, you can create a repo with some namespaces or quotas definitions, and use them to manage your cluster through an app called “namespace-management” for example. Summarizing… there is no limit, but there is a disclaimer: never delete a core app.
Standard
I suggest always organizing your charts repo in the following structure:
application-repo/
├─ chart/
values-dev.yaml
values-prod.yaml
values-common.yaml

or for single deployment
application-repo/
├─ chart/
values-override.yaml
But of course, there are some cases will not be possible to follow the structure above, so, use your imagination.
And then, in the chart folder put the downloaded chart. Example:
helm pull application_you_want
tar -xzf application_you_want.tar
mv application_you_want chart
touch values-YOUR_VALUES_NAME.yaml
Why download the charts?
In my opinion, it’s safer when you want to upgrade the chart. When you download a new chart, you can easily validate using the Merge/Pull Request Diff if there are any changes in the default values.yaml file or any other significant change in the Kubernetes manifest that can break your current helm deployment.
Deploying
Now, I’ll explain my personal example. In my repo, we’ll find more details about the general configuration you can make for your use case, like Google SSO config, Local Installation, and more.
My Stack
- GKE Cluster — Auto Pilot
- Cloudflare
Installation
- Clone my example project: https://github.com/andersondario/argocd-gitops
- Get your cluster credentials.
- Create your TLS secrets. In my case, I’ve created a Cloudflare Origin Certificate.
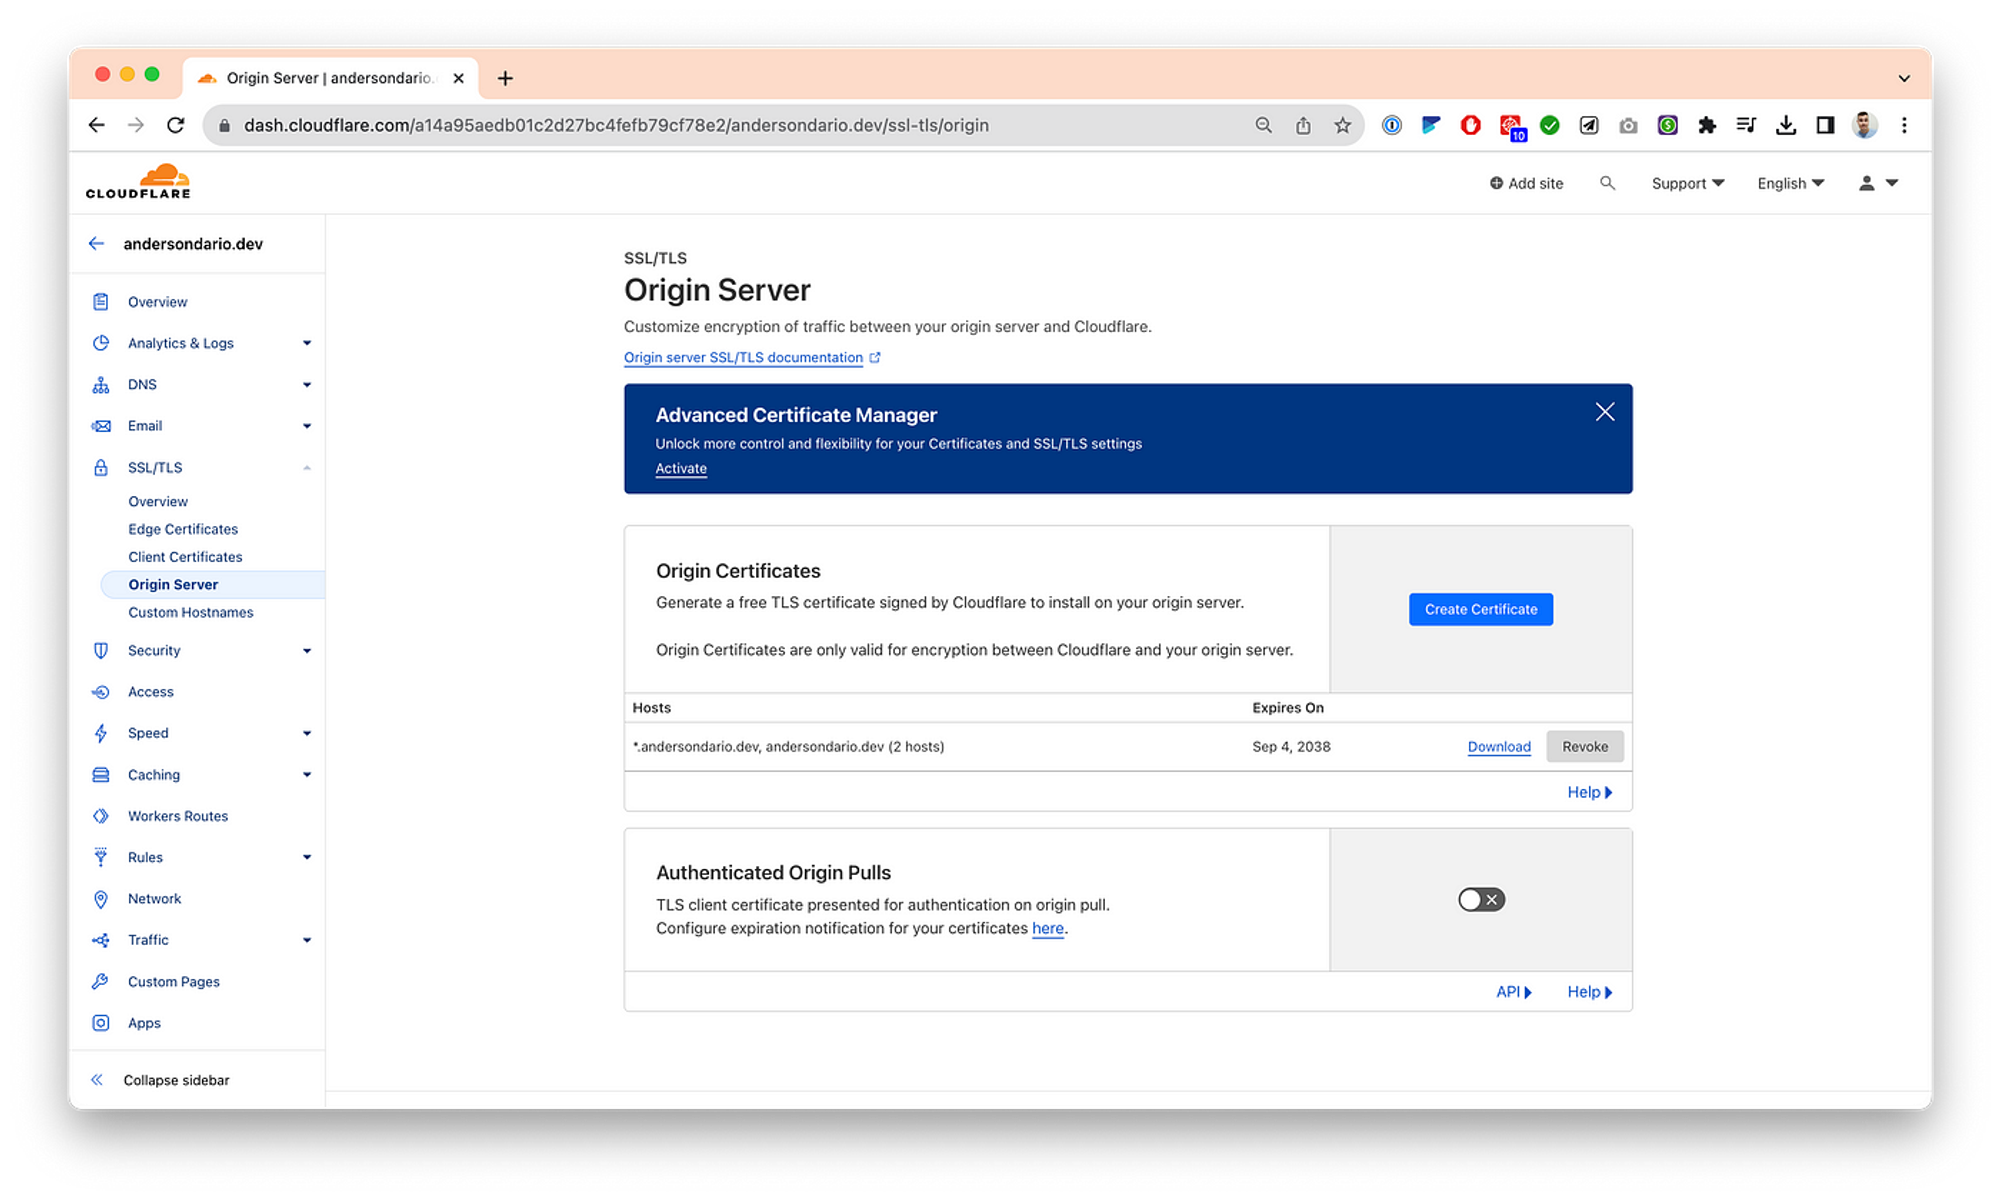
Download the certs and put them into the argocd-install/keys folder.
Let’s start the installation
# Go to argocd-install folder
cd argocd-install

# Create Namespaces
kubectl create ns argocd
kubectl create namespace ingress-nginx

## Deploy Secrets
kubectl -n argocd create secret tls argocd-server-tls --cert keys/tls.crt --key keys/tls.key

# Install the ingress-controller using helm first with ssl-passthrough enabled
helm install -n ingress-nginx argocd-ingress-nginx ./ingress-nginx --set "controller.extraArgs.enable-ssl-passthrough=" --set controller.admissionWebhooks.enabled=false

# Install Argo
helm install -n argocd argocd ./argo-cd -f values-<YOUR_FILE>.yaml
- Get the ArgoCD Ingress IP
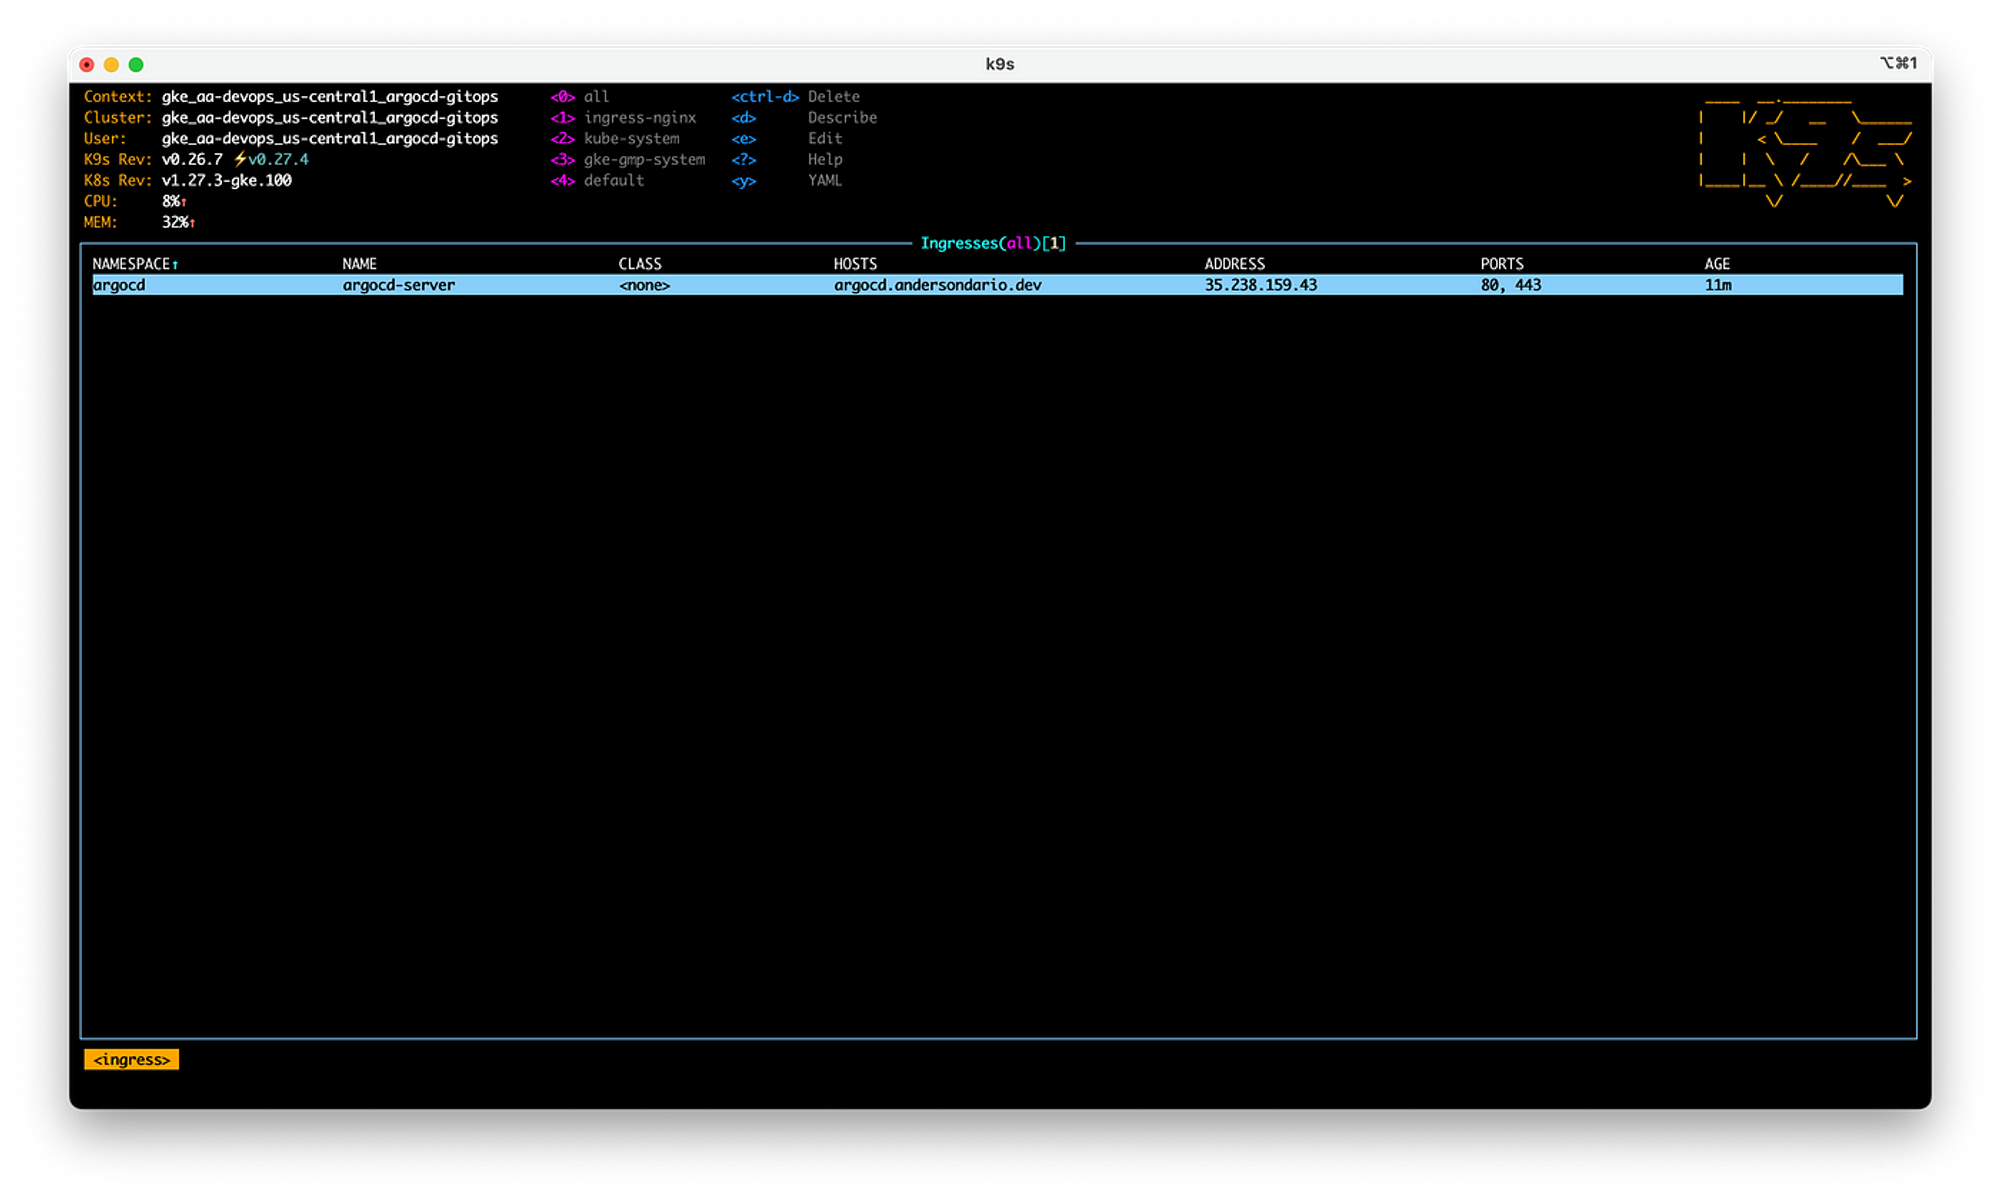
- Add a DNS entry for that IP. If you are using Cloudflare like me, remember to enable the Proxy mode and also enable SSL Full Strict.
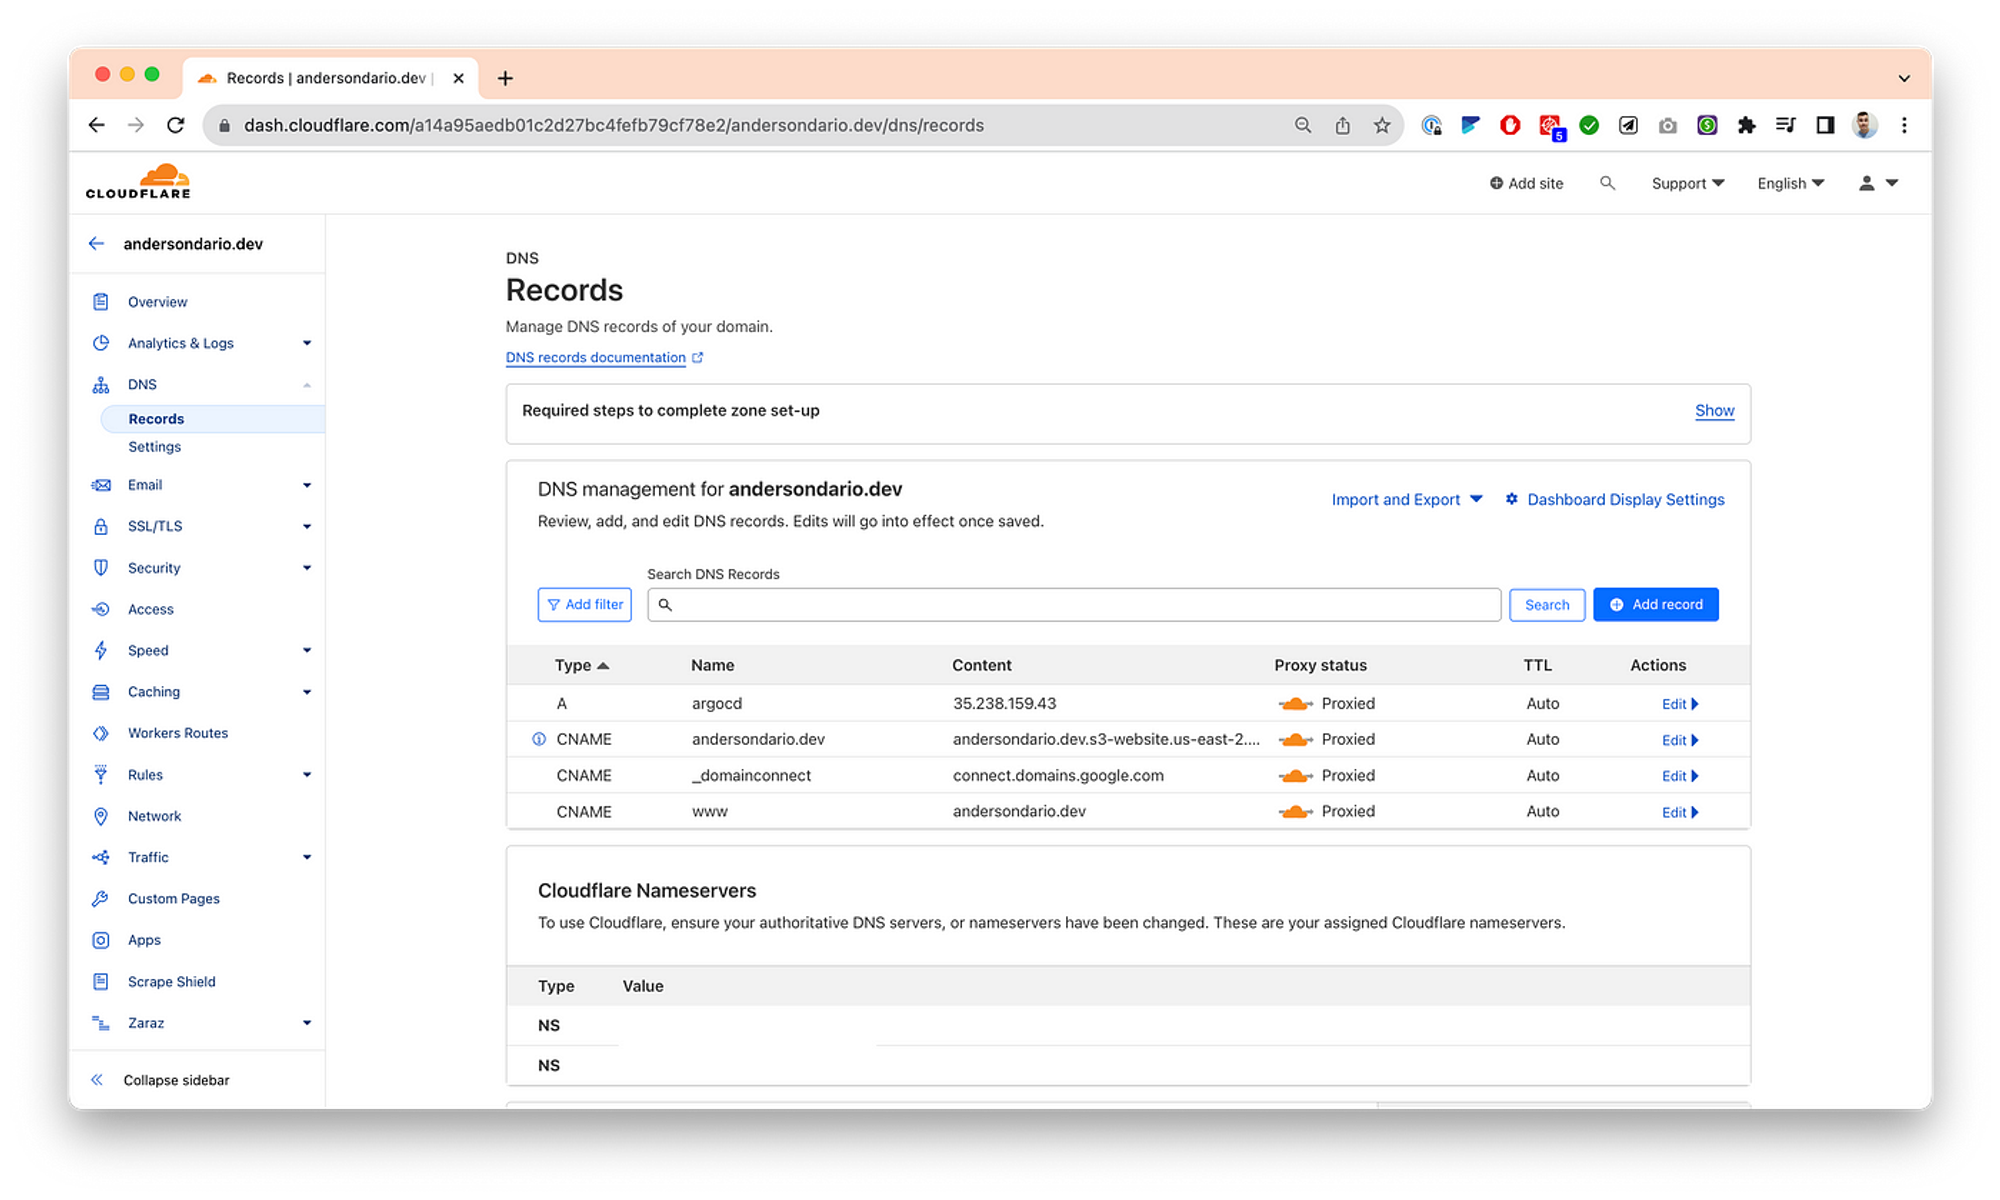
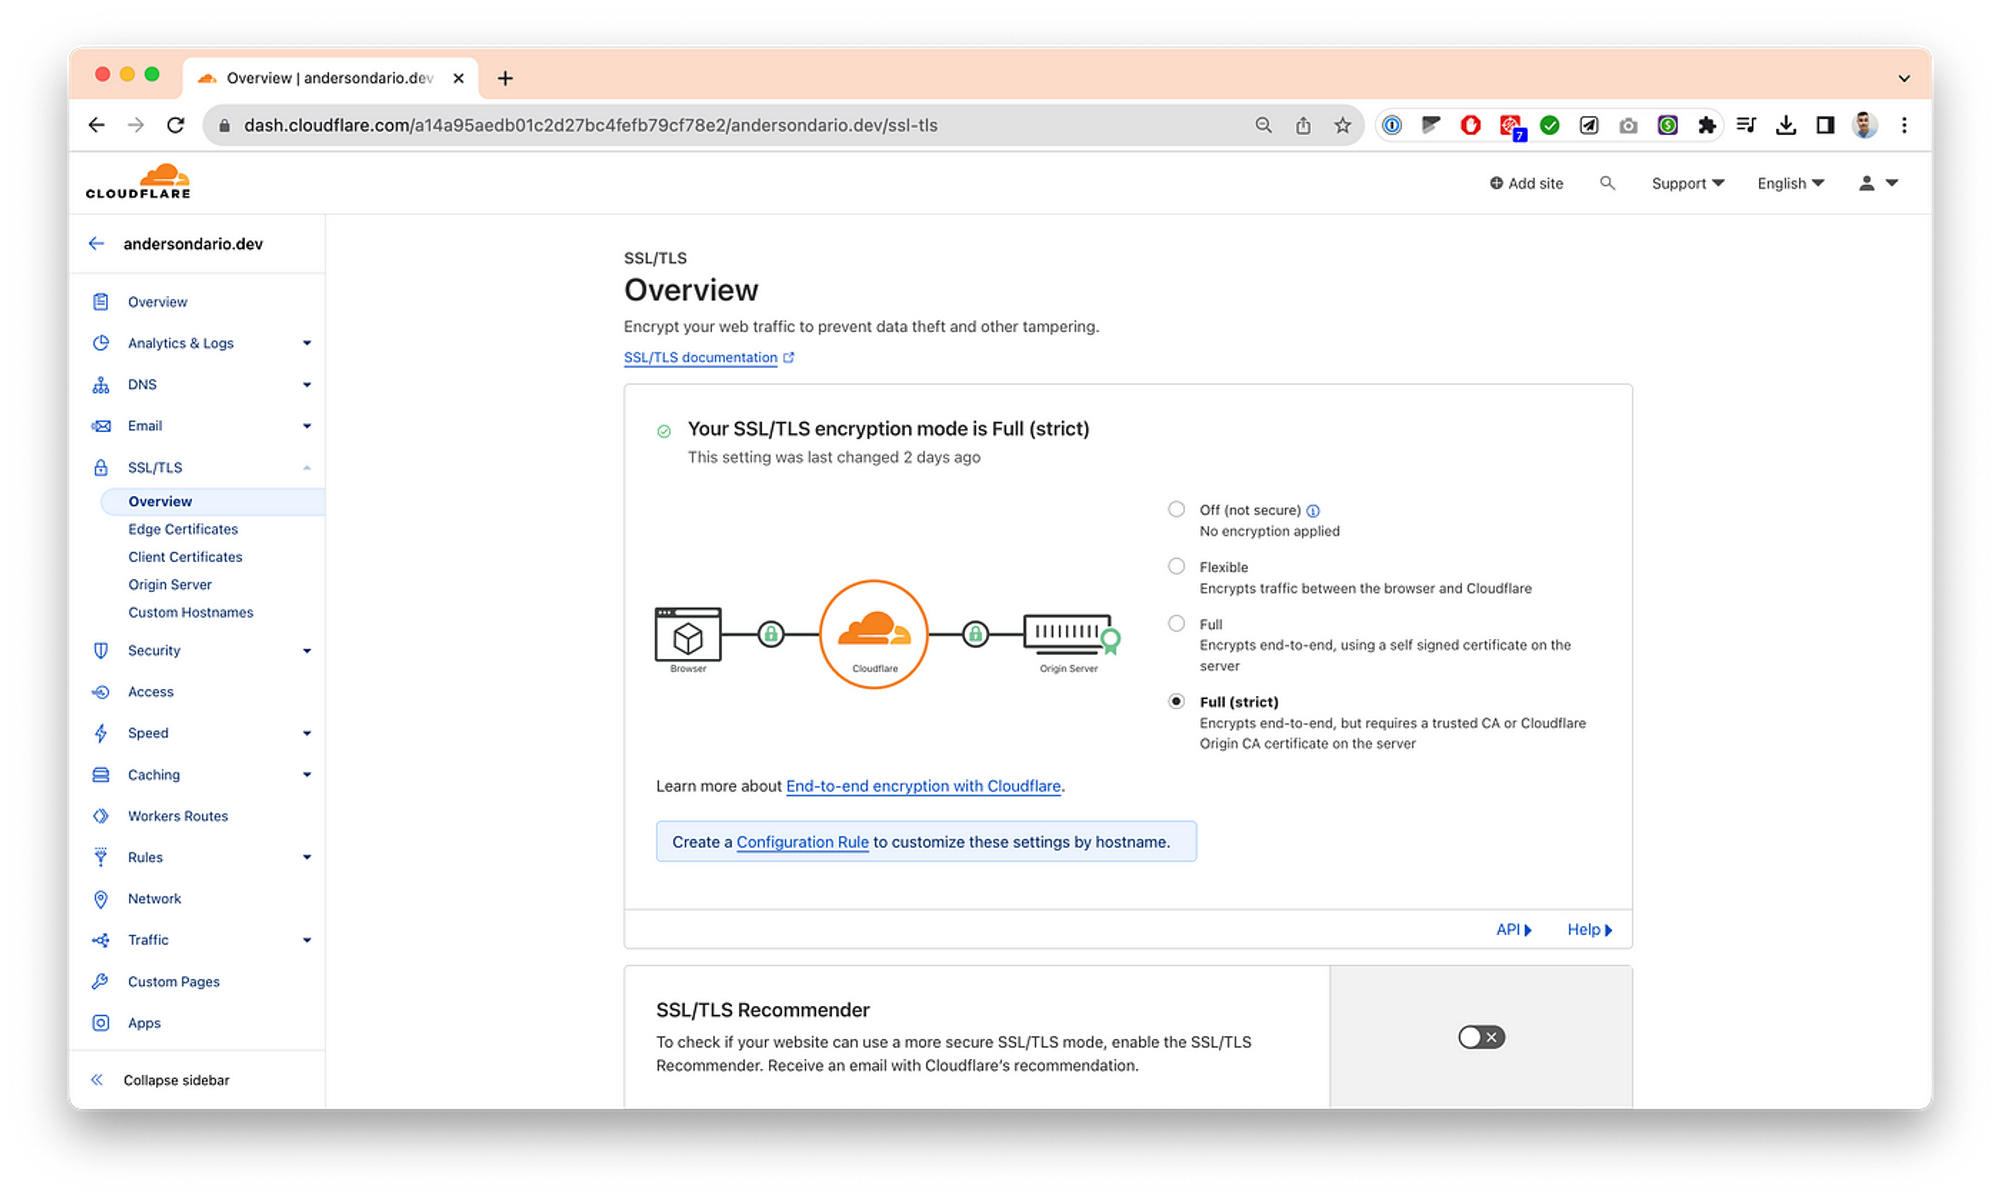
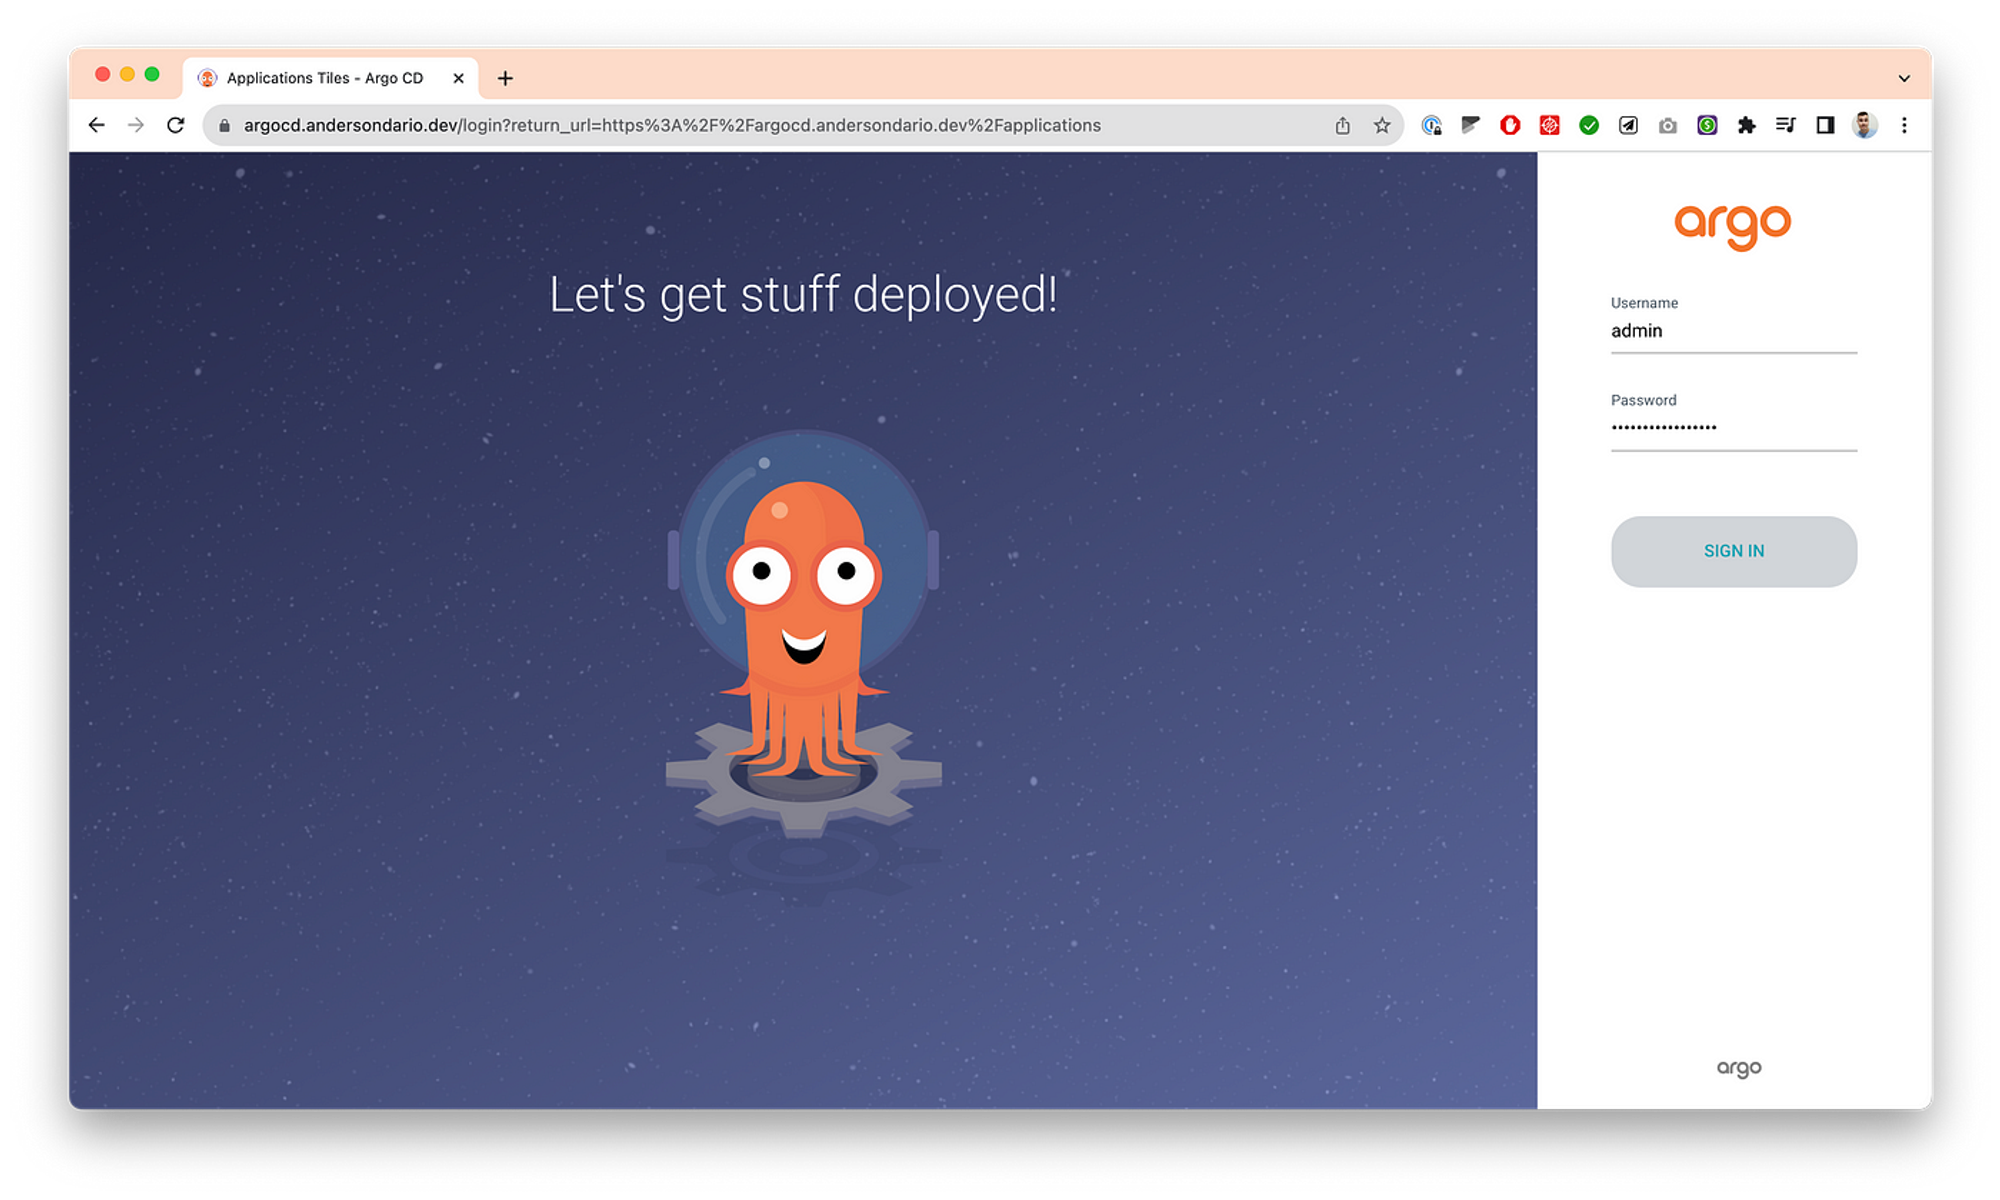
- Get the admin credential and login:
kubectl -n argocd get secret argocd-initial-admin-secret -o jsonpath="{.data.password}" | base64 -d
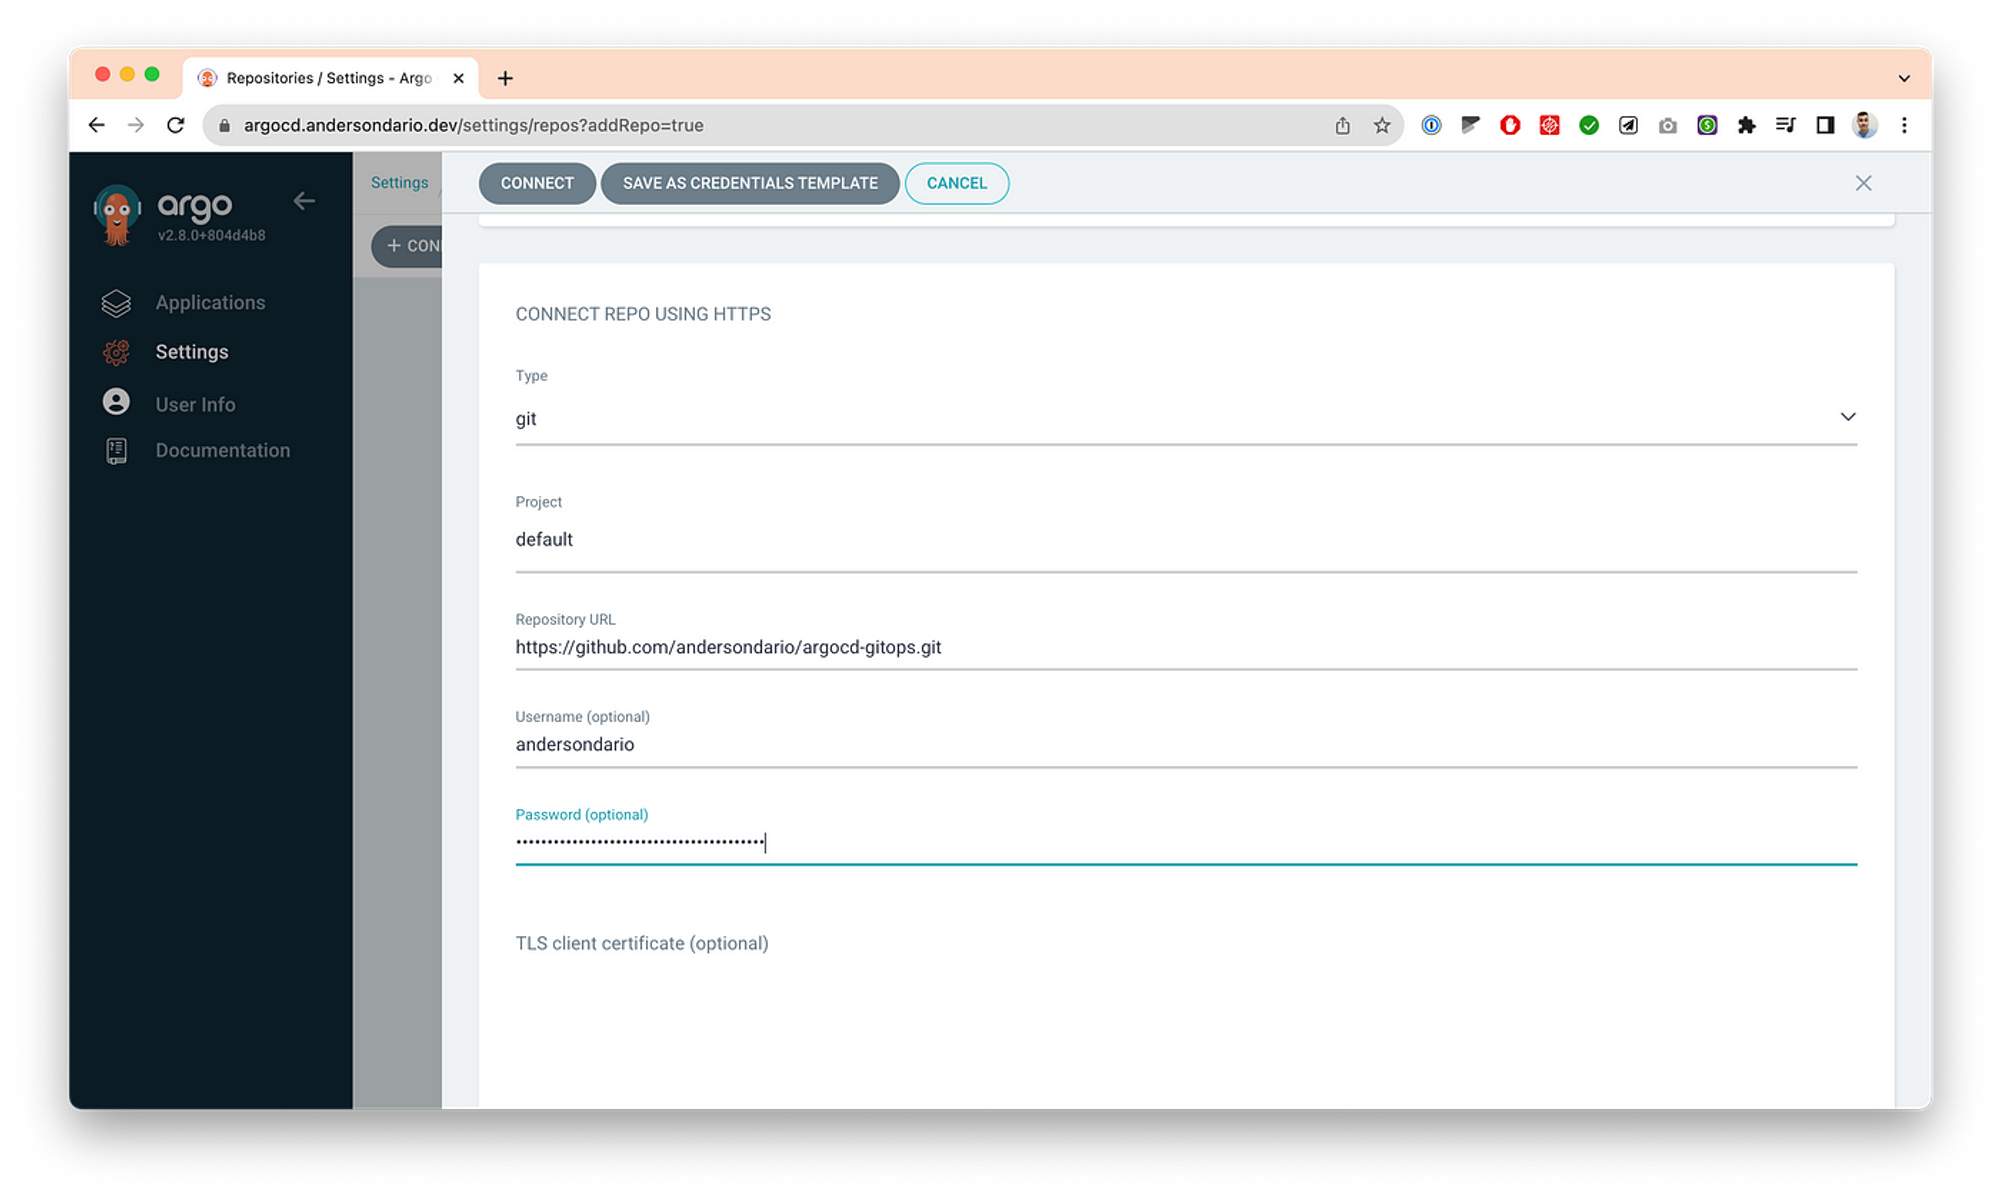
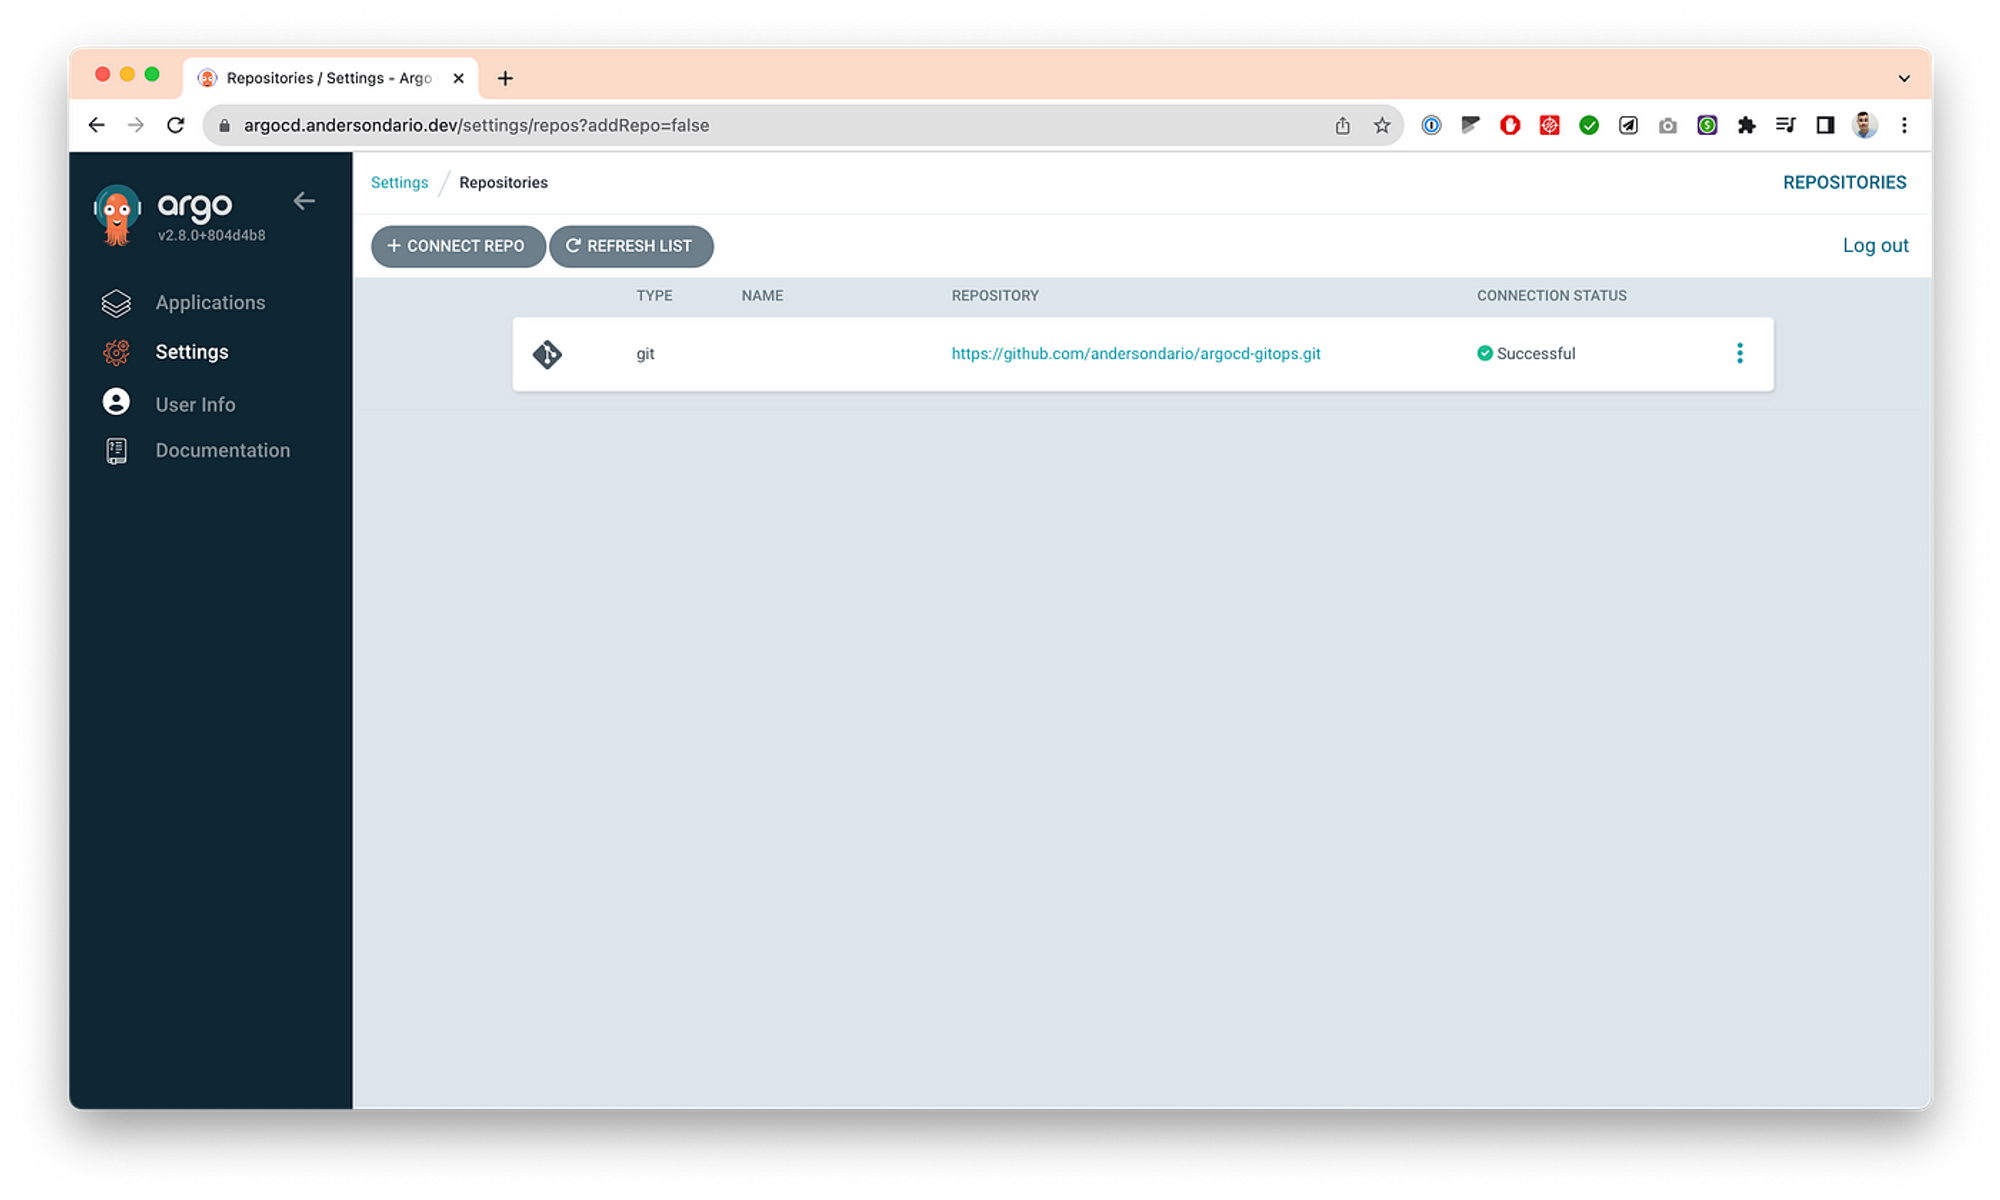
- Add your root repo. In my case it’s the one a shared before with you.
- Apply the core projects and apps configs.
kubectl apply -f argocd-core-projects.yaml
kubectl apply -f argocd-core-applications.yaml
… then, you’ll see the following apps, the core apps as described before, in your screen.
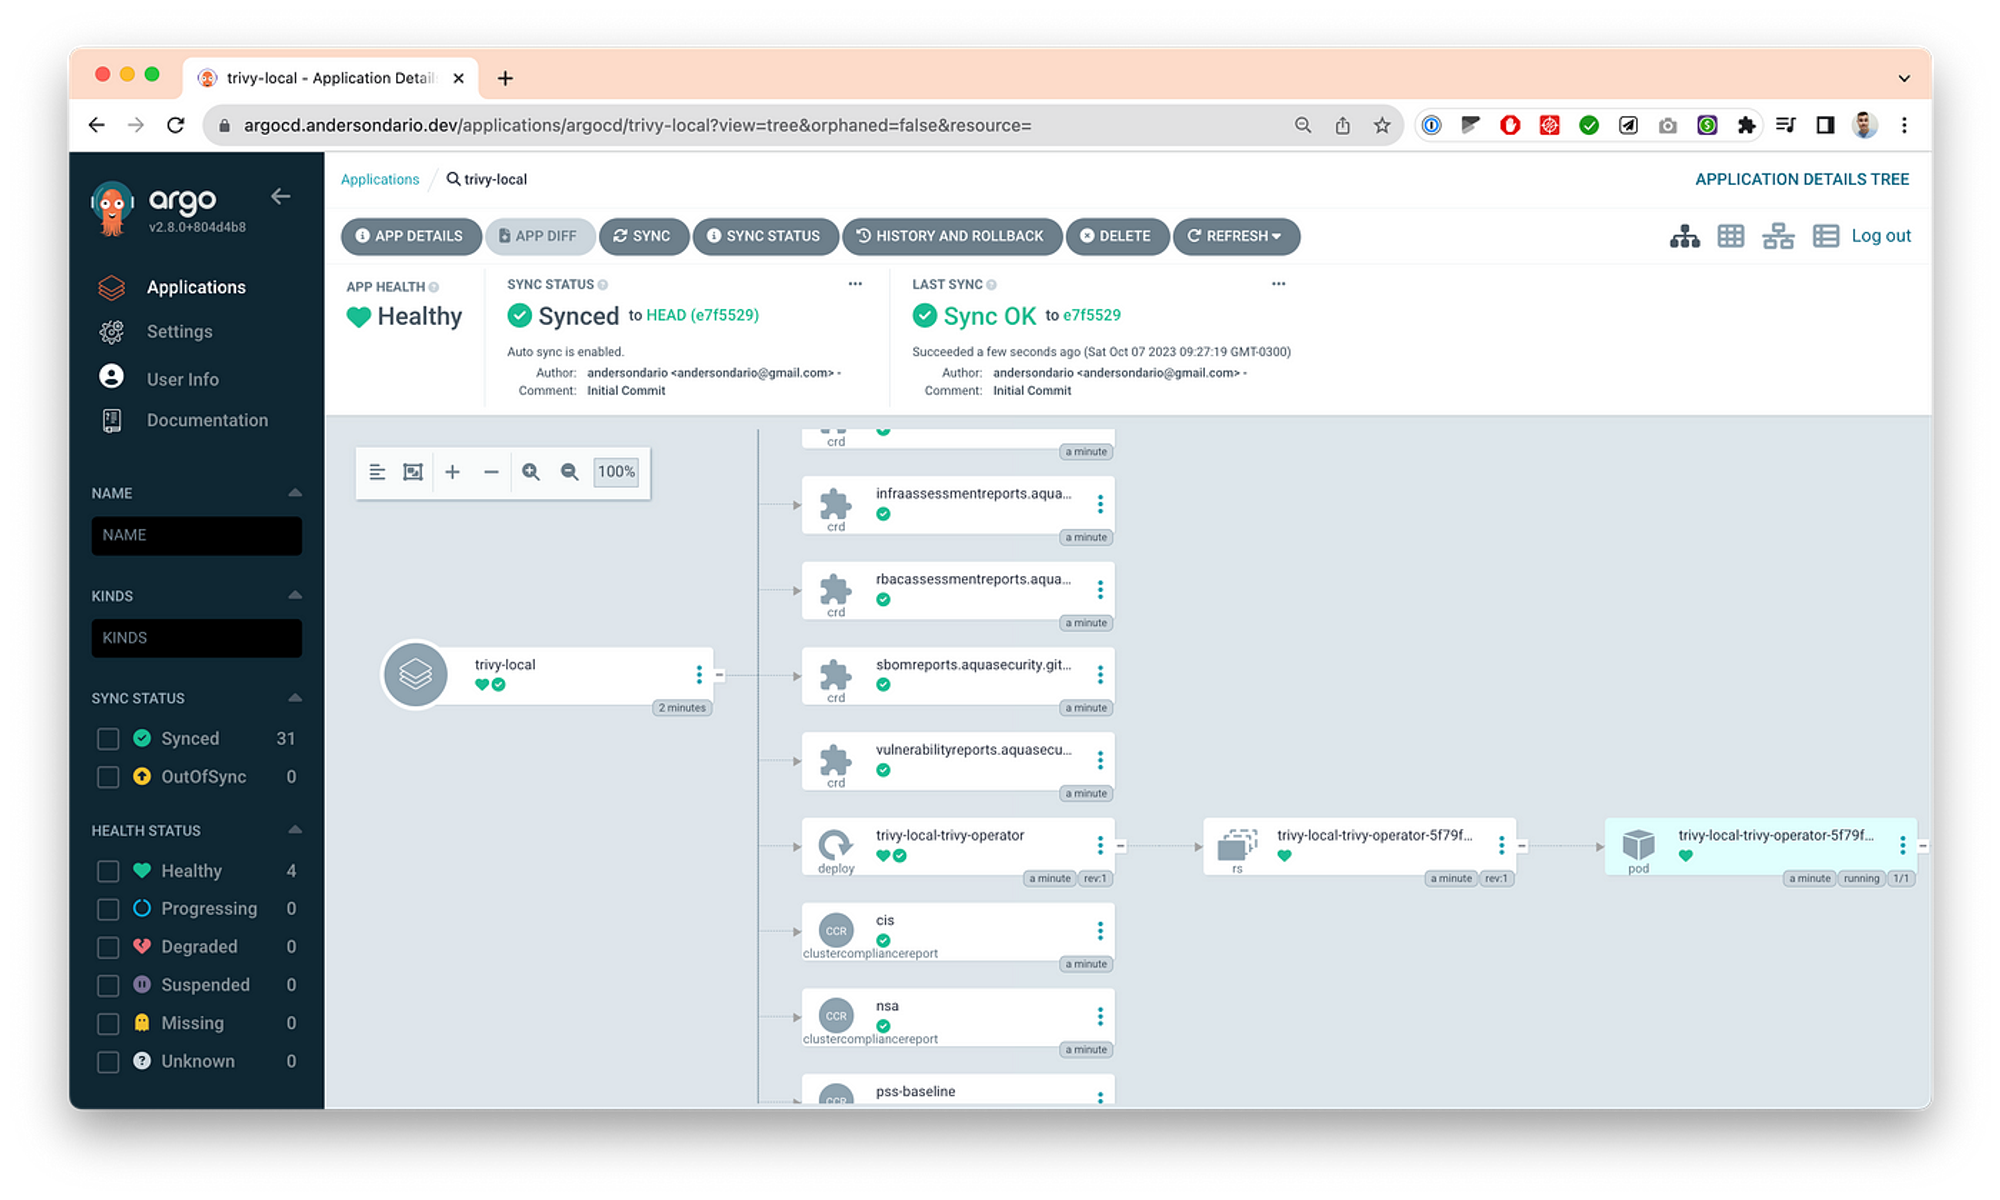
- Then you can define your ApplicationSet and commit inside the argocd-applications folder, and then Argo will sync your changes. Here is one example, where I’ve deployed a Aquasec/trivy app. Same applies for you AppProject by adding some files inside argocd-appprojects folder.
Tips and Tricks
For GKE, don’t follow the official doc to expose your server
If you are using GKE, never expose your server using the default Ingress config. Why? If you upgrade your ArgoCD cluster with a new ArgoCD Chart Version, your new pods will get stuck in this problem: https://github.com/kubernetes/ingress-gce/issues/1718. So I suggest deploying a different ingress-controller, like Nginx, and avoiding following the official ArgoCD documentation telling us to use FrontendConfig + BackendConfig + Ingress for GKE.
If you want to migrate apps from an old Argo cluster to a new one
It’s easy. You’ll need:
- Add in your ApplicationSets the configuration: .spec.syncPolicy.preserveResourcesOnDeletion=true,
- Apply it.
- Check if in the last applied configuration this config is present, and then
- Delete the ApplicationSet from the current cluster and recreate that in the new cluster without the lines added in the step 1.
Following this you will not lose the applications during the process.
If you want to “import” an existing application deployed manually
If you want Argo to start tracking an application deployed manually with helm in your cluster, just create an ApplicationSet that will generate an Application with the same name used in the helm deploy (release name) and with the same values. Then Argo will just identify the resources already deployed instead of deploying new ones.
Tests ApplicationSets
You can test your ApplicationSet by appling manually, you’ll be able to see the generated app inside ArgoCD, and only when you finish your tests you can merge the code inside the argocd-applications folder, then you will be able to see the ApplicationSet as well there.
Backup
Always backup your repositories list after you add a new one, same for cluster. This will help you configure quickly in case of a DR. You can execute the following commands and save the files in a secure place.
kubectl get secrets -n argocd -l argocd.argoproj.io/secret-type=repository -o yaml > repositories.yaml
kubectl get secrets -n argocd -l argocd.argoproj.io/secret-type=cluster -o yaml > repositories.yaml
Production and Lab
You can have two projects, a production one and a laboratory one, just duplicating the repo and changing some configs. In case you want to test critical changes like update ArgoCD, you can deploy your Lab project and test it before you apply the changes in the production project.
Source
References
Support
If you find my posts helpful and would like to support me, please buy me a coffee: Anderson Dario is personal blog and tech blog
That’s all. Thanks.